Showing posts with label rustic. Show all posts

Friday, February 10, 2017

Creative Friday #2: Rustic Wood and Tin Family Sign


Remember the tin letters I showed you a couple of weeks ago a friend gave me for Christmas?

Well, today's the day I show you what I did with them. Welcome to another edition of Creative Friday!

Little did my friend know I was thinking of making a gallery wall and putting a family name sign on it. Her gift couldn't have been more timely!

I instantly knew they were going to be the jumping off point for my name sign. First, I needed a board long enough for the letters so off to my stash of old fence pickets I went.

This board was the perfect length but very dirty so I gave it a good scrubbing down. After it dried, I sanded it down to smooth out the extremely rough texture (I need the letters to stay glued on).

Then I pulled out some white chalky paint and gave it a good coat. (Let dry)
 From there, I gave it a slight distressing.

Last, I glued down the tin letters using E6000 glue. Hangers on the back and voila! A family name sign - a little bit rustic and a little bit shabby. Perfection in my book!

I have a couple more easy projects to share then I'll be putting it all together. It's going to look great!

Be sure to check out my shop  - click on the Tin Roof Studio tab under my header. I've added several new art prints.

Friday, February 3, 2017

Scrabble Letter Sign (and a New Weekly Blog Feature)

Hello my friends!


I love word games. I love to win said word games. Get me to play Words With Friends or Scrabble and get ready - the competitive monster rears it's not so pretty head and I'm out to win...with as many points as I can manage.
source

It's pretty much gotten to the point my family won't play me. And when they do, they gloat when they manage to win. (I can't imagine where they learned that. ahem.)

Today I'd like to introduce to a new feature on my blog - one I will post every Friday. I'm calling it "Creative Friday".

Hopefully, it will help me clear out some of my project stash while providing you with lots of fun and creative projects. On each Friday, I'll share a creative project. It might include an art project, some crafting fun, or furniture makeovers...the sky's the limit!

For my very first Creative Friday, I'm sharing a project I'm making for my gallery wall (you can read about it here). What does it have to do with word games? I'm very glad you asked!

I thought it might be really fun to make a sign using Scrabble letters. I have a jar of Scrabble tiles I found in Canton and several old fence pickets just waiting to be turned into fabulous stuff. Paired with my love for word games it seemed a no brainer.

To begin, I dumped out my jar of letters, gathering the letters to spell out our names. Of course, I wanted them to spell off of each other just like you do in Scrabble. I used Family for the first word and went from there.


 I added my name playing off the "a" in "family", then added "Bruce" off the first "C" in my name. "Jay" was next off the "y", then "Megan" off the "m" and finally "Dylan" was added off the "n" in "Megan". Perfect! It's going to work out nicely.

Next, I took one of my pickets and cut two pieces the same length. Then I sanded them. (If they're really dirty, you might want to wash them down first).

 On the back I glued and nailed little support bars to hold them together.

 Lastly, I made a wash of paint by first lightly dipping my brush into the paint, dabbing it on an old lid (you could use a styrofoam plate) then adding water to the paint on the lid until I had a runny mix of paint and water. I used that mixture to paint the "stain" onto my boards. (I really watered my paint down but you could paint it thicker if you want a more painted look).


After the paint dried, I drilled holes in the upper corners and threaded a piece of rope through, knotting it in front.

Then it was time to add the letters. First, I measured and found the center of the boards. From there, I started with the word "family" making sure the middle of the word was in the center. I glued each letter down, making them as straight as I could.


It worked out perfectly - everybody wins in this word game. So I guess we can all gloat. :o)

Joining these parties:
Show And Share
Snickerdoodle Create Bake Make Party


Monday, January 30, 2017

Gallery Wall Plans


I've been wanting to do a gallery wall for a long time. However, I was struggling with what I'd put on ours. Then this winter while removing Christmas decor, inspiration finally struke.

Here's what I'm starting with - this is the entryway at the city house. It needs some love. 

I've had   the silver cross and the large "B" with the frame around it for a long time. And of course the photos of my kids.

I like the black frames. I feel like they ground the space. And I like the silver cross. But I'm tired of the antique gold color of the "B". What I'd like to do is add more silver and perhaps white to the mix along with some rustic touches.

These tin letters my friend gave me for Christmas will be used here, you can count on it! 

Then I want to add in more family pictures (Megan and Dylan, me and Bruce for starters), some elements like Scrabble letters, bees (we're starting a hive at the farm this Spring), and weathered wood pieces here and there. Eventually, it will all be at the farm so I'm trying to keep that in mind too.

In the next few weeks, I'll be sharing some DIY projects as I bring my vision to life. 

Also, don't forget to sign up for the Brighten Workshop if you haven't already. It is always fun to get together with other bloggers!

I will be demonstrating  how to stencil and you will get to make and take your own garden sign. The sign up button is at the top of my sidebar. Hope to see you there!

Please join me at these parties:
Show And Share

Friday, November 25, 2016

What's New in the Tin Roof Art Studio Shop

I've been a busy bee, painting and painting. My shop is full of all kind of new goodies - please let me show you around! And if you're coming over from Jemma's blog and her "Etsy Christmas Shops Features", welcome!
My shop is not an Etsy shop - you find it right here on the blog under the Pages headings - Tin Roof Studio Artwork For Sale. You don't have to go to a separate link and it's easy for me to keep it updated! Here's a peek at what's new!

First up, is my Rustic Christmas collection:
These are small acrylic paintings (from 2.5" x 3.5" to 4" x 5" canvases) mounted on a piece of rustic board, ready to display on a small stand or propped among Christmas greenery.

Next, are the Christmas Collection paintings. They are larger in size- 4"x6" to 11"x14" and are oil paintings:

Then are two new Christmas Card Collections. There is only one set of each of these so get them before they're gone!

Lastly, are a couple of new paintings that are not seasonal! These are also oil paintings.
"Coffee Love"
Palette knife technique

"Rusty & Trusty"
SOLD!


To see prices and details, head over to the Tin Roof Studio shop.
Remember - as a special thank you to Jemma's readers, I am offering free shipping on all orders placed by December 5th. Please mention code *JemmasFeature* when ordering.

Thank you in advance for shopping Tin Roof Studio and thank you, Jemma! Remember, you must mention *JemmasFeature* to receive the free shipping.

Thursday, February 4, 2016

10 Things I've Learned From Decorating The Farmhouse

Since we bought the farm four years ago, I've learned some important lessons about my style and what makes me happy.

It was pretty much a blank slate when we bought it (lots of brown paneling) that needed some love (and lots of cleaning!). 

I was so excited to put our stamp on it and started gathering ideas right away. There were so many looks calling my name; I was hard pressed to choose a single direction. But I finally decided I wanted a "rustic farm" look so I started using lots of burlap and other rustic elements.

But over time, it started to not feel right, so slowly I've been changing things up. Here's what I learned in the process:

1. It's ok to change your mind. Sometimes it's easy to get caught up in a trend and suddenly you
    realize that's not who you are. It's ok to switch directions.

2. Don't do something just because someone else thinks that's the way you should do it. I was really
    leaning toward painting my mom's bedroom furniture white but I let my sister influence me to do
    blue (it was my mom's favorite color and it helped me not feel guilty about painting it as Mom
    didn't like painted wood.) Guess what? I'm tired of the blue and want to paint it white. BTW, no
    offense Sis.


3. I don't like primitive country. I'm more of a cottagey farmhouse, with a side of what I call abbey
    style (simple, neutral and sort of European look) kind of person- with Mercury glass. I love me
    some Mercury glass!
Rustic cross with a frame around it


4. I like neutral colors - a lot! There's something peaceful in white (or neutral) walls and furniture. A
    little bit of color goes a long way and if you only use it for accent colors, it's easy to change. 
Walls better painted all white but there's still a lot of color going on in here

5. I love my chalkboard wall. I knew it would be a cool feature, but I didn't realize how much I'd
    really dig it. I love everything about it - from being able to write on it to the color. Who knew a
    black wall would look so good?

6. I don't want clutter. I'm tired of opening closets, cabinets, etc. and seeing stuff I don't use or love
    anymore plus we have less space to store stuff. And, all that clutter tends to spill out onto any flat
    surface in the house.


7. Less is more. The living room furniture isn't quite right. It's a fairly small room and some of the
    pieces are too big/bulky for the space. I will need to really edit this space when we move up here.

8. Better made items pay off in the long run. Don't buy cheap, you'll just have to replace it in a couple
    of years. It's better to save up and get quality. This is especially true on big purchases like furniture.
    Inexpensive however, is acceptable if it's made well.

9. It's good to have fun with your decor. I love a touch of whimsy; it adds character to your space.
   (see number 5).
While I love the lamp, I don't love the shade.

10. It's ok to say no. People have been very generous in offering us things to use at the farmhouse.
     We've gotten quite a bit of things to use (lamps, furniture, kitchenware, etc). While that's great,
      don't let  your space become someone else's dumping ground. It's ok to politely refuse. If they
      insist and it's not your style, gift it to someone else or take it to your local charity. Again, this goes
      back to numbers 6 & 7.

That all said and done, I still have plenty of rustic style going on that I love:

My laundry room door, wall, and shutter:


My sliding barn door:

before painting

after painting

And my light fixtures in the kitchen:

love the barn light pendants over the bar!
And my barbed wire wreath:

The two spaces I got right are the master bedroom:

and bathroom:


Both of those spaces make me smile when I walk into them.

I'll continue to tweak and change the other spaces until they are where I want them. Some will wait until we move there full-time but others like the guest room (paint furniture white, maybe repaint the walls), kitchen, and laundry room (I want to get rid of some of the primitive decor on the walls) can be done before.

In the end, it comes down to decorating with what you love and discovering what makes you happy.

Monday, December 15, 2014

Farmhouse Christmas Decor


Welcome! It's Christmas at the B Farm. This year again I'm using my woodland/rustic theme with my Nutcracker collection thrown in for fun!

On the front porch, the bench got a simple wreath and I put large ornaments nestled among greenery in the urns:


There is always joy to greet you when you walk in the front door:


My metal basket is filled with a wintery, woodsy look complete with burlap, of course:


The entry table also has on its Winter finery:


Place card chickens

And the funky chickens are ready to p-a-r-t-y in their Santa hats:


Here's the tree with its woodland/rustic theme:


The angel Gail from Purple Hues and Me sent me

Sweet ornament I made to remind us of "The Reason For The Season"


My ornament last year from Vicky's Annual Ornament Exchange

One of my tin can lid ornaments
This year we used a bucket as part of the tree skirt then swirled some red burlap around that:


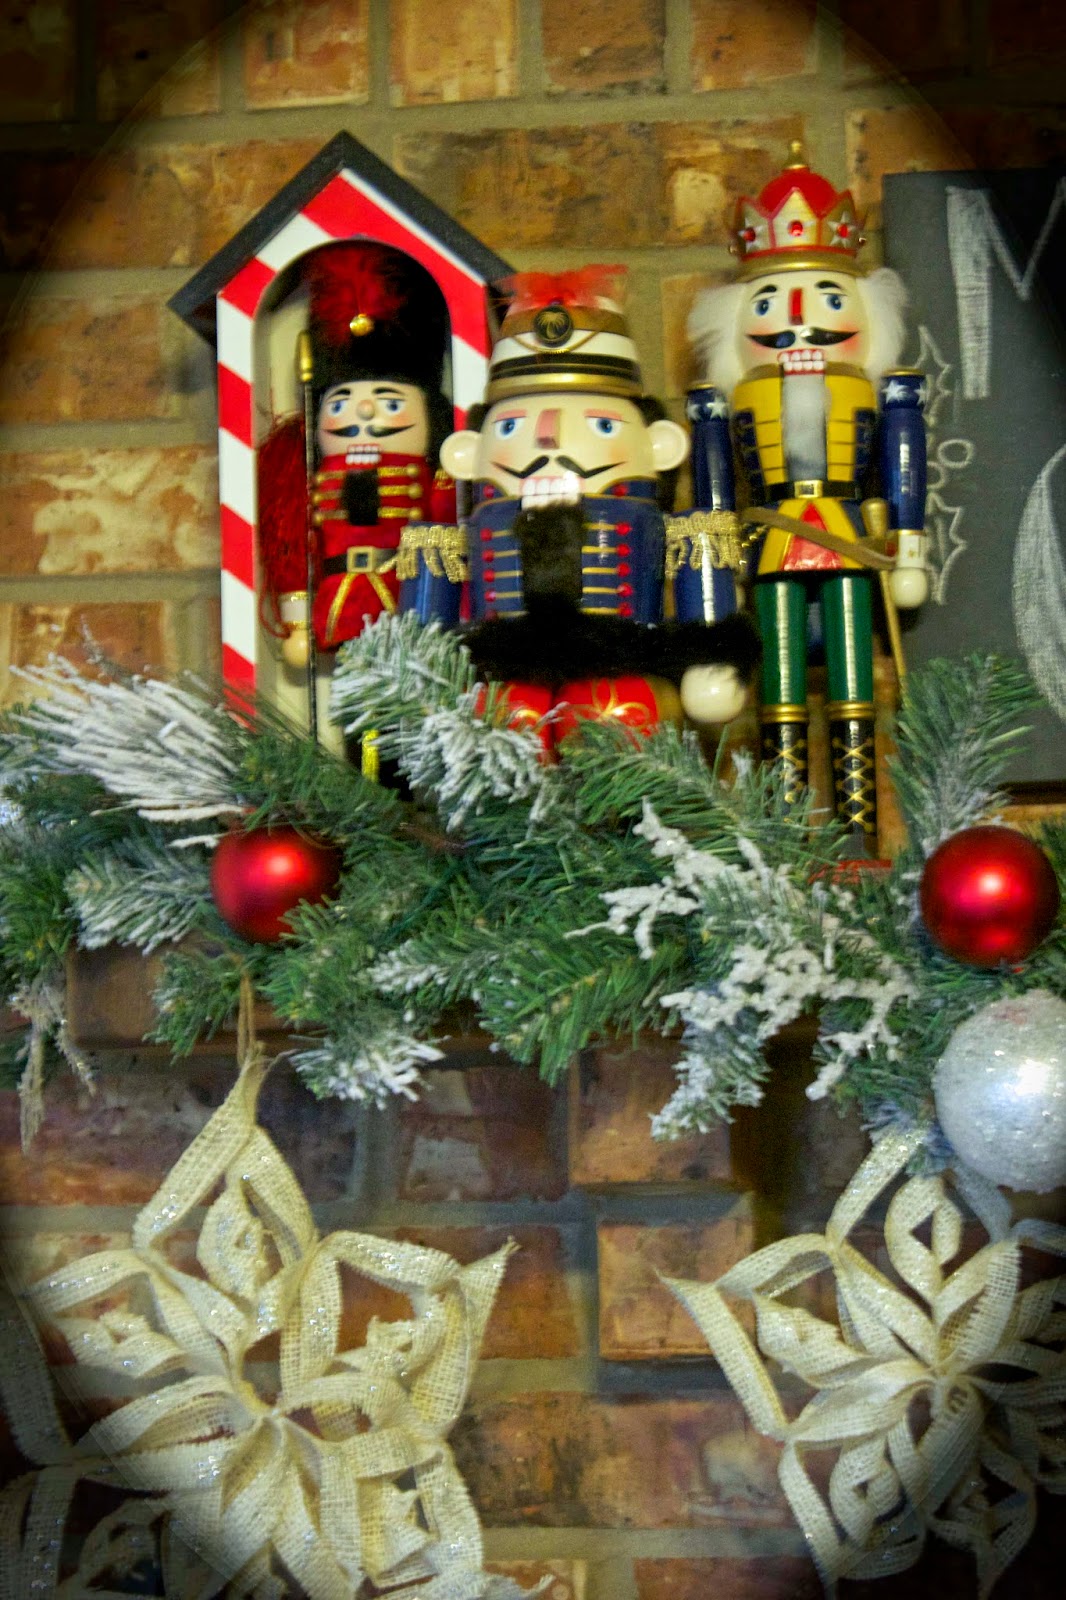
The fireplace has a snowy pine garland, burlap snowflakes, and several nutcrackers flanking my Christmas chalkboard:


And my small round chalkboard sits on the hearth with a bottle brush mouse:


The Uncle Sam Nutcracker is in the dining room:


In the kitchen, my Baker Nutcracker stands in the window:


Along with the egg basket filled with ornaments, and a cheery "ho ho ho":


For the kitchen door going out into the garage, I made a raggy wreath in reds and neutrals. I tied on some of my cookie cutters and a couple of metal mittens I found at Michaels:


The wreath was easy to make - I tore and cut strips from three different red materials and unbleached muslin, then tied them to a metal wreath frame until it was full. Love it!

heh, you can see the trash cans and barbecue pit out the window

The nice thing about this wreath is I can remove the mittens after Winter and it can then
stay up all year.

Even the bathroom has some Christmas cheer:


I really enjoy decorating my sweet little farmhouse. Now if it would just get cold enough for a fire in the fireplace...


Springtime Projects 3: Have A Seat!

It might still be Spring, but here in Texas, things are starting to heat up and feel like Summer. I knew I needed to get the last of my Spri...