Showing posts with label farm. Show all posts

Tuesday, February 21, 2017

Progress at the Farm


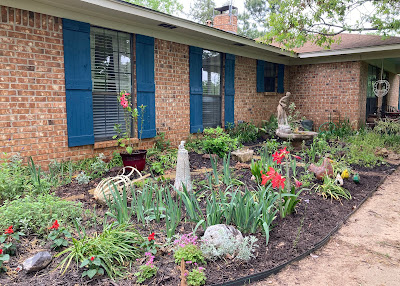
I've been hard at work on the flowerbeds - along the driveway, around the house.

Leaves had to be raked and briars dug up. Good grief. Those things have huge tubers...no wonder you can't kill them!
I kept finding more and more until I had a huge pile of potato looking tubers.  The plant is Smilax. It grows all over the place.
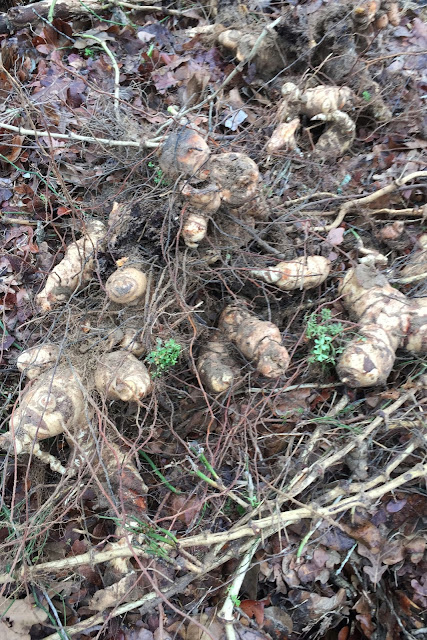
They fought me leaving me scratched up but I won! The bed is cleaned out. 


 There were several creeping lantanas in front of the garage. They take over the sidewalk every Summer so I dug them up - all sixteen of them. I transplanted them to the driveway bed which should be the perfect spot for them. They can spread out and bloom away. A big bonus - butterflies love them!

I know it doesn't look like much now, but soon the slope will be covered in yellow blooms.

My oldest sister gave me 4 native lantana bushes. They got planted along the driveway too in the back of the bed.

Oh! While digging the briars out, I kept finding these concrete edger pieces buried under the dirt. Once upon a time, I think there were some really pretty flowerbeds here. #thankyouformerowners! 

I used them to edge the back flowerbed behind the garage. It should help keep the dirt and plants where they belong. :o)


Jay and Bruce got all the leaves raked up in the front wooded area where the little dogwood tree is budding out. I see a flower peeking out at me!

I'm excited about getting this area cleaned up! I can't wait to plant a woodland garden!
Random bulbs that were half buried in the leaves!

I can just picture a pretty bench in this area facing the house with pretty plants. With the years of leaf accumulation gone, I can finally see my vision coming to life!

Plus, I started weeding the front flowerbed. Can I just say it's going to take time? #neglectedforwhoknowshowmanyyears and full of weeds.

Spring is showing up early in all sorts of ways - tiny wild violets

With several of the trees sporting a hint of green and the redbuds blooming.


The bees were buzzing all over the redbuds! #buzzbuzz

And all the outside trim on the studio is up and painted! Woohoo! It looks so good!

Next time the door will get its new red coat. Then the outside will officially be done and it's onto the interior!

Definitely making progress! It sure helps that the weather has been so mild. I just hope we can get most of the outside stuff done before the heat hits. All in all, it was a very productive couple of weekends.


Monday, May 20, 2013

First B Farm Recipe

I love seeing what's blooming and growing at the farm. It makes me dream of the day when we move there and I get to have a huge (well ok, maybe not huge but big!) garden and lush flower beds. One day, I'll have all sorts of things to cook that come from our farm and flowers to bring in the house. In the meantime, it's exciting to discover what plants are showing off.

This last weekend, we found these just starting to ripen:

Blackberries!!

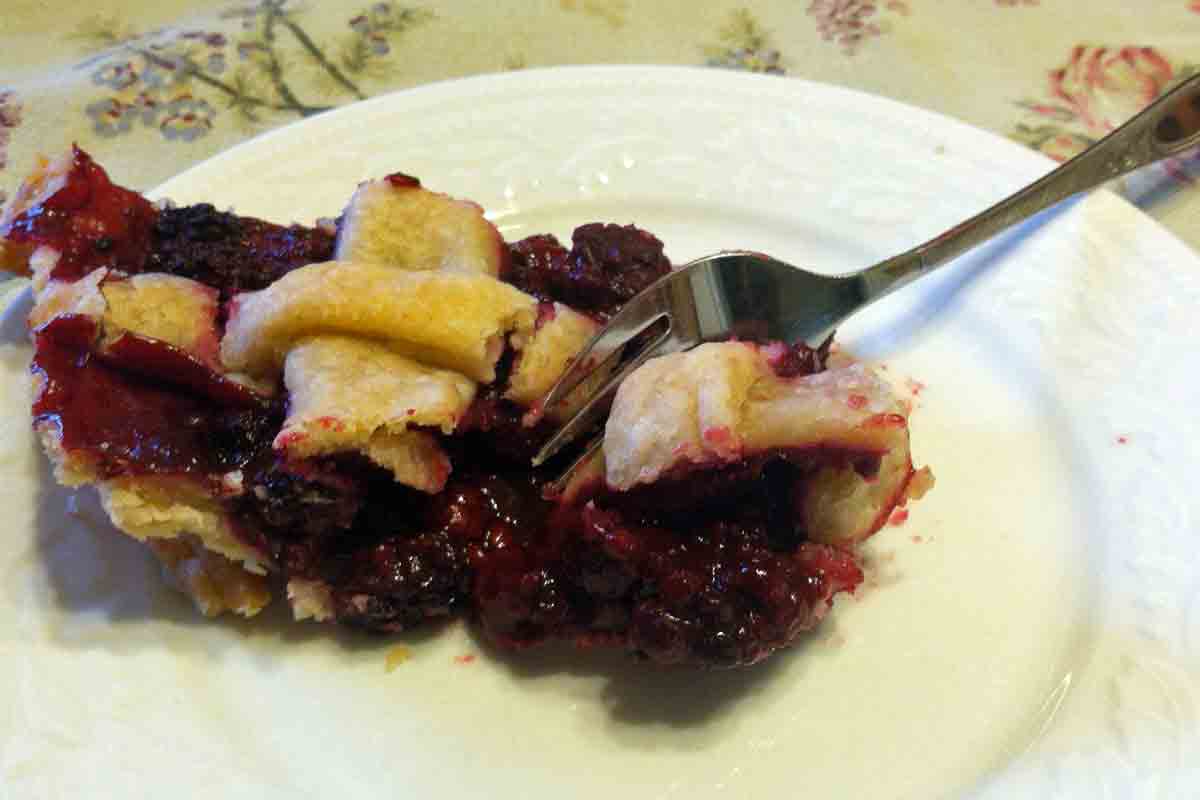
Our son went with us...before I knew it, he was out picking them. He got enough to make one of these:

And yes, he's the one who made it!

YUM...

Thank you, Jay! It is delish!!

Here's the recipe he used:

Recipe for Blackberry Pie:

Double-crust pie pastry (see below)
4-5 cups fresh blackberries (can use frozen)
1 cup of sugar
1/4 cup of flour
1 1/2 Tablespoons lemon juice
1/4 teaspoon of salt
1 Tablespoon butter

*Roll out 1/2 the pastry to 1/8" thickness on a lightly floured surface. Place in pie pan and trim edges.

*In another bowl, combine berries, sugar, flour, lemon juice, and salt. Toss well. Pour into pastry shell;             
  dot with butter.

*Roll remaining pastry to 1/8" thickness then cut into 1/2" strips. Arrange strips over pie in a lattice 
  design; trim even with bottom pastry, folding under and crimping to seal edges.

*Bake at 425 degrees for 10 minutes, reduce heat to 350 and bake 45-50 minutes more or until crust is 
  browned.   Serves: 8

Double Pie Crust 

2 cups flour
1 teaspoon salt
2/3 plus 2 Tablespoons of shortening
4-5 Tablespoons cold water

*Combine flour and salt; cut in shortening until mixture is crumbly. Add water one Tbls. at a time, stirring with fork until mixture is moist and forms ball. Divide into 2. Roll Pastry out and fit into pie shell. Use 2nd half for top.

I think I will be bringing more of these beauties home next time...maybe Jay will make another pie (pretty please?) or we'll just put them on ice cream or perhaps eat them all by themselves....

Who wants to go berry picking?
:o)
Cecilia

PS

I noticed the muscadine grapes are growing. Hm, wonder if he's up to making jelly the end of June?

Linking up here:
Stone Gable On the Menu Monday week-of-may-18
Coastal Charm Nifty-Thrifty-Tuesday-no164
DIY Showoff That-DIY-Party-17
Life On Lake Shore Drive Time-For-You-To-Shine-At-Bouquet-Of Talent
The Dedicated House Make-it-pretty-monday-week-50

Monday, October 1, 2012

Stool Makeover

I found a surprise at the farm this weekend - clumps and clumps of these beauties!


I can't tell you how happy they made me! They remind me of my mom - she had them in her yard- ( I'd lost all of mine here at my city home ) and I had no idea these were at the farm. So I did a Happy Dance...good thing only Lucy was there to see me and being a dog, she thought I was playing with her. :o)

Of course, I had several of my projects I took to place/finish up. There's the small toolbox and the fireplace sign - both done and in place. (But that's another post or two).

Then there's the two little stools I got for $3. Yep, you saw it right. $3. I was only going to get one but the man at the thrift store said I could have both for the price of one. Sweet! I only had an idea for one of them but figured I'd come up with something for the second one eventually. You know how that goes! :o)


So of course, they both came home with me! The first one immediately got the old vinyl cover removed and replaced with a remanent of a burlap coffee sack. Then its legs were painted barn red.


Now it sits next to the tub holding a small tin bucket filled with washcloths. And I must say, I love it! Just the perfect, extra touch for the bathroom.


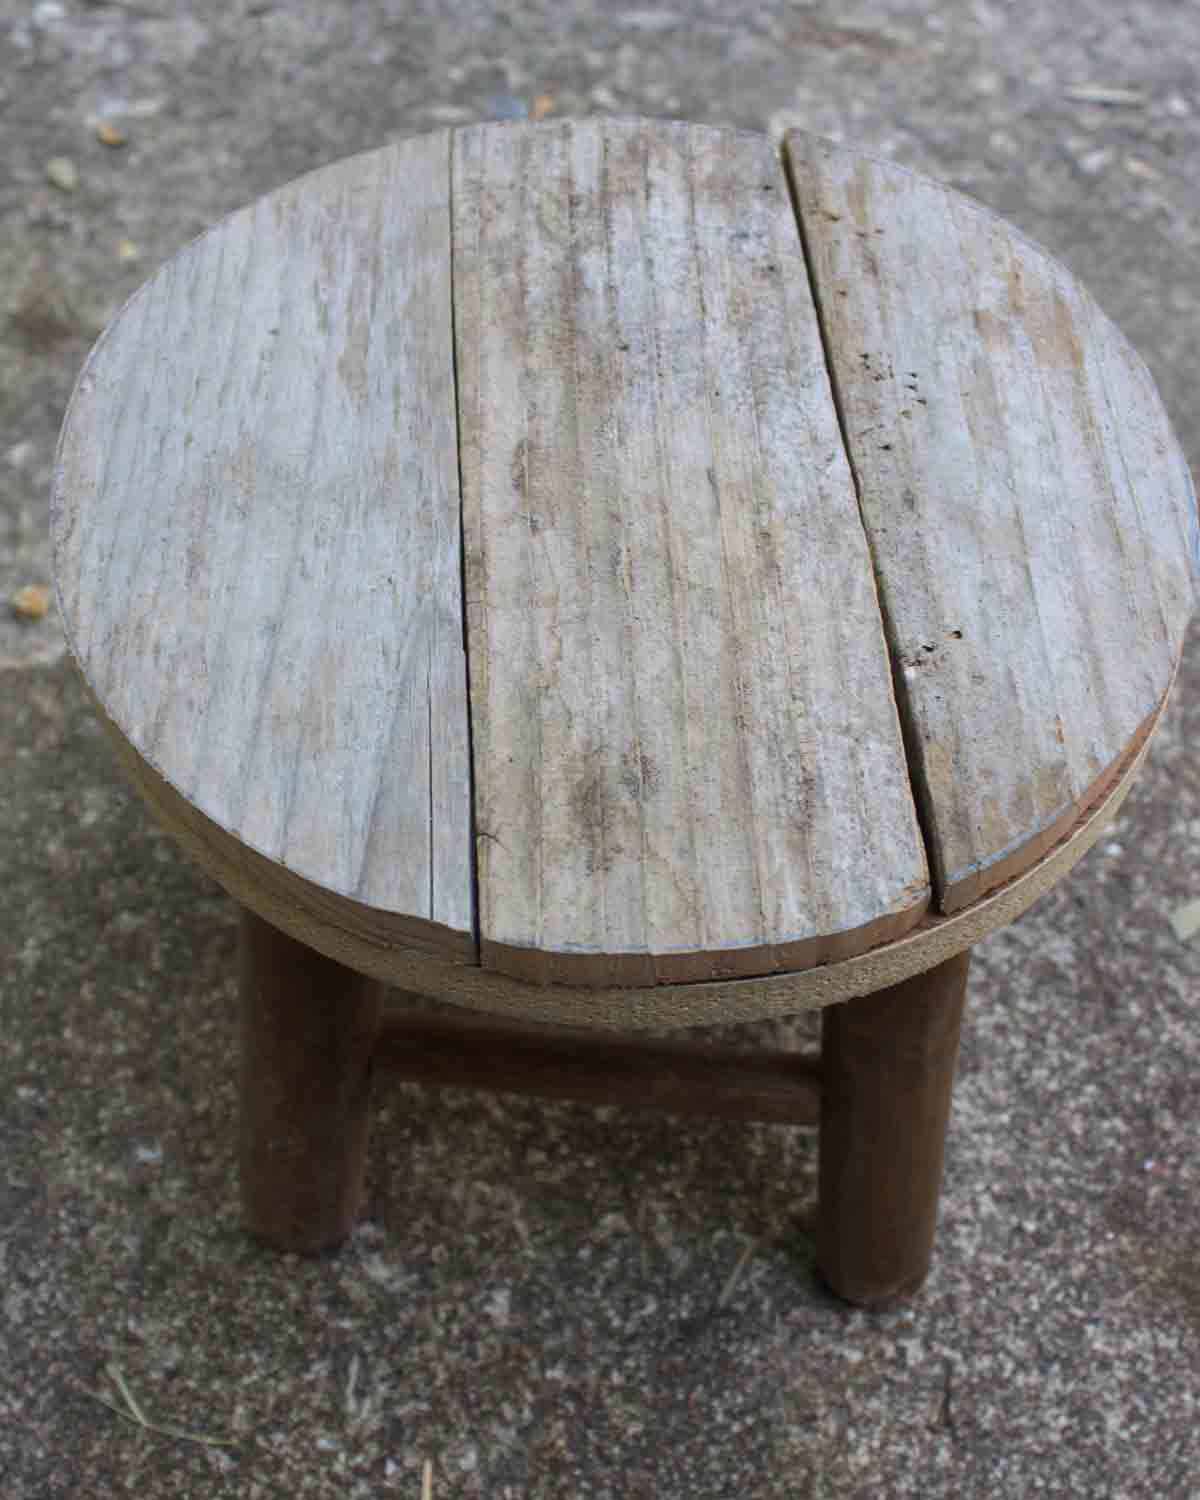
But the 2nd one has languished, uncovered and unpainted, waiting to be used. hmm, what to do with it? Poor little stool. Feeling unloved, unwanted, and oh so ugly! Then it dawned on me - why not use it  to elevate things? Of course! (Smacks forehead)
Yucky particle board top
For that though, it needed a new top. Old fence pickets to the rescue! (so many uses for those!) They're rustic enough to fit my vision; so 3 lined up, the old top traced onto them, cut out, and I have a cool looking stool! Mr. B shook his head and wanted to know what I was doing....just wait, you'll see, Dearest. :)


I made up some homemade chalkpaint, painted the legs white, glued the new top on, then added the burlap skirt. Sanded. Brushed paint onto the top. Added ball fringe. Distressed. And voila! Cute stool.


Now it sits in a place of honor. Loved, wanted, and cute. Makes me one step closer to getting the fireplace all spiffed up and looking less....bricky. :)


Holding a lantern on the fireplace.
I also placed my wood sign above the mantel. It turned out great - can't wait to show it off, so be sure to come back next week to see it.

Enjoying the Fall weather,
Cecilia

Joining these parties: Debbiedoos Newbie party
DIY Show Off diy-project-parade-52

Monday, September 10, 2012

coffee cup lamp

I have seen some great teacup lamps on  Pinterest and various blogs. One of my favorites is from Lisa at Recaptured Charm. Go check out her blog; she has amazing projects! She inspired me to make a cup lamp for the B Farm's kitchen!
Since my theme seems to be chickens and coffee, I searched thrift stores for the perfect coffee cups with, of course, a coffee theme or chicken theme. I found 4 cups I liked - 3 with a coffee design and a soup mug with chickens on it. All were $1.99 or less.
My choices for the lamp


I decided to drill holes in my cups since my husband was willing to help me. For a tutorial on how to make one without drilling, you can go here: Country Living teapot-lamp-project.

I played with different arrangements of my cups and decided to eliminate one to keep it the size I wanted and only use the soup mug and 2 coffee cups - one in a similar color to the mug and the other in a contrasting color. Then we assembled all our tools:


drill, masonry bits, glass bits, sharpie to mark where to drill, tape, water, and of course, the cups and saucers.

Mr. B used a small bit to start the hole. (He drilled slowly until the hole was started.) I held the mug( not sure this was smart but oh well!) and squirted water on the piece as needed. Fortunately, most would hold a small pool of water on the bottom. (*Just a note of warning: this is definitely a two-person job unless you have a way to clamp the piece down securely. Also the drill gets hot and heats the water, so be careful! Wear safety glasses to protect your eyes.) Once the hole was started ( put tape over spot to allow drill to grab), he switched to a larger bit to make the hole the right size for my rod.
Mr. B's holding it here, then he had me hold it so he could keep the drill steady

It was slow work. Mr. B finally switched to the glass bit as it was sharper than the masonry bit. He didn't put a lot of pressure on it - didn't want to break the cup. I also had him drill holes in the two saucers. (These were inserted between the cups for stability.) Lastly, he drilled a smaller hole on the side of the bottom cup for the cord to go through. This was the trickiest part - I propped it with a board under the handle to help stabilize it.

Lastly, I took all inside and washed the grit and grime off. Then using a lamp kit I'd bought plus extra lock nuts, I threaded the cord through the side hole of the bottom mug and then up the rod. Then I assembled all the pieces, holding them together with lock nuts. Lastly, I glued the bottom mug and saucer together so they couldn't come apart...the rod doesn't go all the way to the bottom of the mug as the cord has to have room to exit out the side. In reality, that mug didn't need a hole in the bottom - just the side. Oh well, live and learn!

The shade is one I found at Target - covered in burlap, of course! I added the trim to spice it up a bit. Cute, don't you think?


Of course, all this was done here at my city home so when I got to the farm and placed it on the counter, it was too high! Ack! Mr. B suggested I get the wooden crates out of the shop and make a table to set it on, so I did. ( He really does have good ideas! ) I placed it in the corner of the dining room (it needed something anyway as it was feeling way too empty!) and ta da!  Perfection!! Still part of the kitchen decor and found the perfect use for my crates. ( happy dance)
here it is lit up

good use of the crates!

Colors go with my mugs!


Unfortunately, I forgot to take a picture of the whole dining room. Take my word for it, it looks great in that corner!
What do you think?

Glad you stopped by for a visit. Tomorrow I'll show how Fall has come to the B Farm!
Cecilia

Linking with these parties:
DiyShowOff- diy project parade-51
"Life on Lakeshore Drive"
Debbiedoo's
CoastalCharm nifty-thrifty-tuesday-no130

Friday, September 7, 2012

Off to the farm

Hurray! We're going to the farm this weekend! Can't wait! Need to take care of a few things while we're there. No. 1 on the list is to have the exterminator come out and treat for scorpions again. I do NOT like them coming into the house. I know I'm in the country, people (it's what everyone keeps telling me), but I don't have to put up with stingy things creeping around. ugh. So, I'm glad the bug man will be out to squirt his magic dust around. :)
Just posting this picture is making my skin crawl!


Of course, it's time to decorate for Fall so that's also on my to do list.  I've been dragging out all my Fall decor to see what I have and want to take:

Pile of stuff!


Then there's the new pieces I've been working on:

new wreath and burlap covered pumpkins


And the thrifted makeovers - like my kitchen clock. It was just plain metal so I used a Sharpie to draw on it and added the sweet phrase:
Good Will find - paid $1.99! Drew cups on with pencil to start with

Then outlined with a Sharpie

Added details and a cute saying! Ready to hang in the B Farm kitchen


And I've gotten my mom's bedroom furniture ready to stain. The bed frame needed to be reglued so Mr. B did that the last time we were there.


Thank you, Bruce!

 I'm using a blue wood stain as I want the grain of the wood to show and blue was Mom's favorite color! t's going to be beautiful. I've already done the stool for the vanity. Here's a sneak peek:


Same fabric as curtains


Can't wait to show off where it's all going! Have a wonderful weekend!
Cecilia

Springtime Projects 3: Have A Seat!

It might still be Spring, but here in Texas, things are starting to heat up and feel like Summer. I knew I needed to get the last of my Spri...