Showing posts with label garden. Show all posts

Friday, March 3, 2017

Creative Friday #5 - How To Add Magic To Fairy Figures

I've had these resin and terra cotta pieces for a fairy garden for a year or so. It's time to give them some magic! 

Thank goodness it's Creative Friday because today it's their turn out of the product stash.

First up is this cutie.

The dogs got a hold of her back when they were puppies. They chewed off her wings and Mr. Toad's foot. Poor thing. And they are drab resin grey. Let's see...I have some oil paint left over from a painting. Wonder if it will stick? Yes, it does so I painted her and Mr. Toad.

However, the little fairy still needs wings. A trip to the craft store turned up some pretty butterflies.

The body pulled off easily and with a dab of E6000 glue, she now has pretty wings! And she's no longer grey!

This sweet dragon is getting color added to him. Shhh, don't wake him!

Here he is with his wings and back ridges painted.

This candle holder I found at the thrift store is also getting painted. There's lots of detail on this piece so it's taking awhile but it promises to be pretty! And I'm adding something to the top that makes it even more whimsical.

Almost done! I changed the color of her dress...
Oops. Got some blue paint on Mr. Frog! And I spy another flower that needs paint!

This little one is also missing her wings - I need find something to use - but she'll get her wings back!  Her flower crown and dress need paint and I will be done with her.
Almost finished!
Those were all done using oil paint left on my palette. On the next figures I'm using acrylic craft paints.

Mr. Fox was printed from my daughter's 3D printer...how cool is that? But pink won't do - he will soon be fox colored.

A terra cotta gnome was repainted after his original coat flaked off. I also antiqued him so the details show up better. Love his little blue bird!

And this ceramic gnome and mouse are waiting their turn under the brush as well. I can't tell you how long I've had him...years. Poor thing. He's been patiently waiting for me to give him some magic!

And let's not forget the cute mushroom house I got from Thrift Store Addiction. A coat of red on the roof is the start of this makeover! The flowers around the doors will also get painted.

I'll admit the oil paint takes longer to dry than the acrylic. And I have to use tiny brushes for most of the pieces. It takes patience and a steady hand. But steadily I'm adding the magic to my sweet fairy figures.

All figures will get a coat of clear sealant to protect them.  And then the real fun will begin. My old wagon will hold the fairy garden. (There might even be a castle! )

So with a little bit of paint, magic is added to the fairy figures.
_________________________________________________________________________________
There's a promo going on for Society6 to get 20% Off ALL Apparel, Totes, Pouches, and Phone Cases + FREE Shipping on everything. Go to my site here. This is good through Saturday!


Thursday, February 20, 2014

A Touch of Spring

Ah, Spring
How we have longed for thee...


The daffodils and snowdrops are blooming at the farm:


The weather was perfect...warm, breezy, and cloudy in the morning with sunshine in the afternoon. First thing I did was  switch out the winter decor for a Spring one.

 I changed all my chalkboard signs to Spring sayings:


And put out this sign:

Changed  up the mantel:


And entry table decor - I need to bring my Spring garland up to drape over the window frame as it still looks a little bare:


I freshened up the look of the hearth with my Spring wreath and flower arrangement:


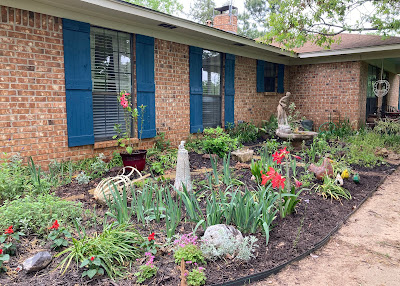
And then, I did something I've been wanting to do since we bought the B Farm  - I made a flower bed!


The bricks were already there - I discovered them when I started to dig...they were overgrown with weeds. So I dug out the weeds, reset the bricks, moved one of the Lantanas from the other side of the sidewalk, moved some bulbs, and placed my galvanized tub with irises in the corner.

 I can't begin to tell you what a pleasure it was to work in this soil compared to the thick, black gumbo we have in the city. Yes, I'm going to love gardening here!

Another spot I've been wanting to tackle is along the driveway. Once again, someone had gone to a lot of trouble to plant a lot of bulbs and irises. But after years of neglect, they were buried and almost lost under layers of leaves and the thorny vines and shrubby stuff had taken over.

Leaves raked away from the irises
Bruce was sweet and helped me. We raked, cut, and pulled out years of growth. I made several trips back and forth to the burn pile to dump the debris.


 By mid afternoon, we were tired and scratched up yet we were happy with our progress.
top of the driveway now all cleaned up
 I'm looking forward to adding my own flowers and plants to the flower beds. Slowly but surely, the farm is looking cared for again!

Monday, May 20, 2013

First B Farm Recipe

I love seeing what's blooming and growing at the farm. It makes me dream of the day when we move there and I get to have a huge (well ok, maybe not huge but big!) garden and lush flower beds. One day, I'll have all sorts of things to cook that come from our farm and flowers to bring in the house. In the meantime, it's exciting to discover what plants are showing off.

This last weekend, we found these just starting to ripen:

Blackberries!!

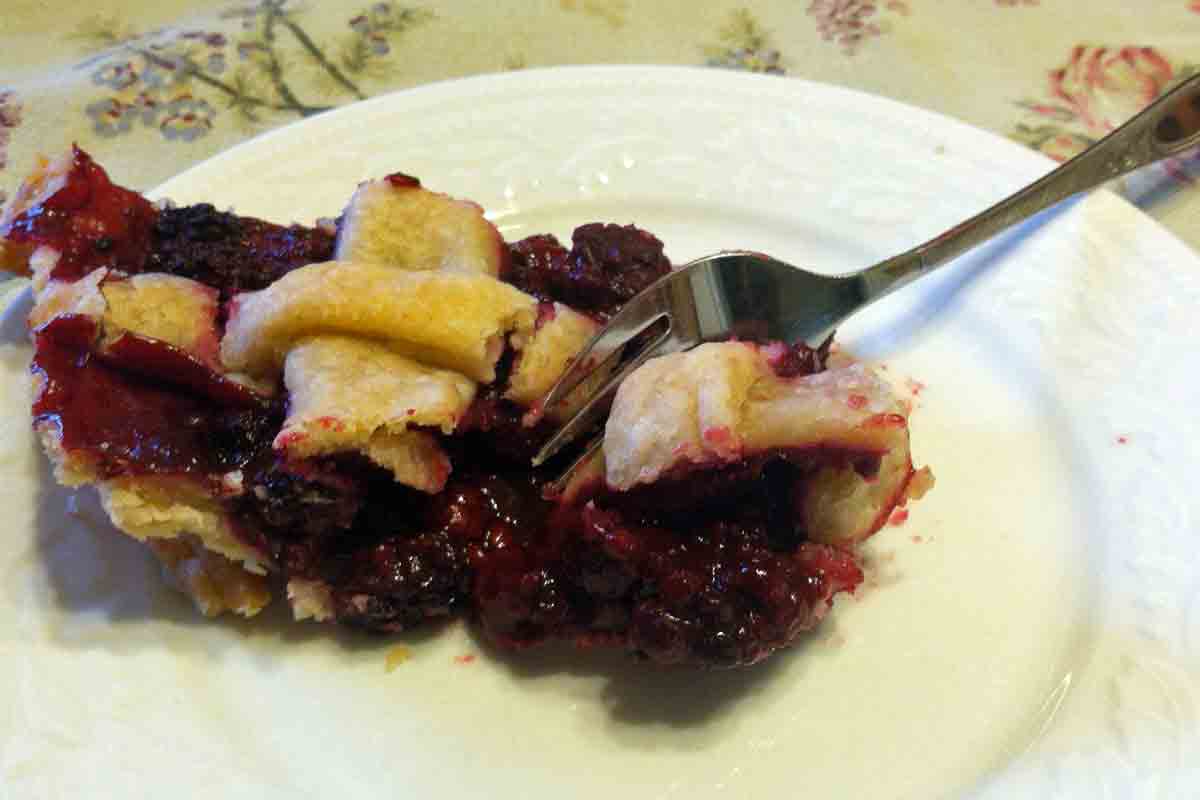
Our son went with us...before I knew it, he was out picking them. He got enough to make one of these:

And yes, he's the one who made it!

YUM...

Thank you, Jay! It is delish!!

Here's the recipe he used:

Recipe for Blackberry Pie:

Double-crust pie pastry (see below)
4-5 cups fresh blackberries (can use frozen)
1 cup of sugar
1/4 cup of flour
1 1/2 Tablespoons lemon juice
1/4 teaspoon of salt
1 Tablespoon butter

*Roll out 1/2 the pastry to 1/8" thickness on a lightly floured surface. Place in pie pan and trim edges.

*In another bowl, combine berries, sugar, flour, lemon juice, and salt. Toss well. Pour into pastry shell;             
  dot with butter.

*Roll remaining pastry to 1/8" thickness then cut into 1/2" strips. Arrange strips over pie in a lattice 
  design; trim even with bottom pastry, folding under and crimping to seal edges.

*Bake at 425 degrees for 10 minutes, reduce heat to 350 and bake 45-50 minutes more or until crust is 
  browned.   Serves: 8

Double Pie Crust 

2 cups flour
1 teaspoon salt
2/3 plus 2 Tablespoons of shortening
4-5 Tablespoons cold water

*Combine flour and salt; cut in shortening until mixture is crumbly. Add water one Tbls. at a time, stirring with fork until mixture is moist and forms ball. Divide into 2. Roll Pastry out and fit into pie shell. Use 2nd half for top.

I think I will be bringing more of these beauties home next time...maybe Jay will make another pie (pretty please?) or we'll just put them on ice cream or perhaps eat them all by themselves....

Who wants to go berry picking?
:o)
Cecilia

PS

I noticed the muscadine grapes are growing. Hm, wonder if he's up to making jelly the end of June?

Linking up here:
Stone Gable On the Menu Monday week-of-may-18
Coastal Charm Nifty-Thrifty-Tuesday-no164
DIY Showoff That-DIY-Party-17
Life On Lake Shore Drive Time-For-You-To-Shine-At-Bouquet-Of Talent
The Dedicated House Make-it-pretty-monday-week-50

Springtime Projects 3: Have A Seat!

It might still be Spring, but here in Texas, things are starting to heat up and feel like Summer. I knew I needed to get the last of my Spri...