Showing posts with label laundry room redo. Show all posts

Friday, March 17, 2017

Creative Friday #6 - Repurposed Shelf

It's another Creative Friday! This week it's all about a project for the laundry room at the city house. Come see what I did!

Remember the heart shelves from the 80's? I found a couple at the thrift store some time back. They are great little wooden shelves - though dated. The first one I took apart and used it to make a sign for the guest room. It is fun and whimsical.

The second one is just the right size for the laundry room. However, I wanted to give it more of a farmhouse look.

 The first thing I did was sand the glossy white paint off on the edges and sides:

Next, I cut an old fence picket to fit between the supports (making sure it covered the hearts up) and over the shelf. After sanding them, I glued and clamped them on, leaving it to dry overnight:

 The next day, I brought it in and add screw hooks:

As you can see, the top board is sitting on the original shelf. I added a couple of screws to make sure it stays on.
It's great I didn't have to take the shelf apart to achieve this look. I don't mind the original shelf showing under the new one. I think it adds character. 😀

It sits right by the door going into the garage so it's perfect for extra keys. A little chicken wire basket on the shelf holds string or whatever.
I love how it turned out. The hearts are gone and it looks old and farmhouse-y! Plus, I was able to repurpose an old discarded shelf and a fence picket. A win-win as far as I'm concerned.

Also, I got this in the mail - it's from Kris over at Junk Chic Cottage. She's in the process of moving but still had time to share these cute Spring bags with us and I won one!
I know just where I'm going to put it. (Stay tuned!) Thanks, Kris!

I'm sharing at these fabulous parties:

Monday, February 27, 2017

Refreshing the Laundry Room in the City House

Have you ever walked through a room in your house and all of the sudden get hit with the knowledge it's well, awful? That happened to me this past week. I usually come into the city house through the laundry room as it is the pass through from the garage to the house. Just a warning - these aren't pretty staged photos...they're real life.

Here's some before pics:
door goes to garage
cat food on top of the dryer...keeps the dogs out of it :o)
opposite the washer and dryer, shelves for storage with a curtain to hide it

I see it so often (going out to my car, doing laundry), I've become "blind" to its flaws.

That is until last week. Something finally clicked and I saw how shabby it had become. Yikes. Time to make a plan and give this space a makeover.

First thing I did was take a look on how the space was used. Here's the list I came up with:
1. My major way in and out of the house - it would be nice to utilize the space with that in mind.
2. Obviously laundry
3. It's where the cat litter box is kept
4. Storage shelves

Here's a diagram of the space:

The niche where the freezer is supposed to go (we have always had it in the garage) has been used for all sorts of things: it was our Office in a Hole (the name our children gave it) when we needed an office spot, it was a crafting area, a sewing area, and finally it's where the litter box is. There are shelves above for storage.

It just wasn't working for me anymore. It was cluttered and dirty (I swear I clean in there but it certainly didn't look like it. Gross).
Niche area - I'd already started clearing it when I realized I hadn't
taken a picture. There were 3 shelves all a full as the one shown.

Here's the plan I came up with:
First, find a cabinet or bench the litter box would fit in/under to hide it from view. Secondly, go through everything and get rid of the excess. And third,  provide some kind of hook or shelf to put my purse and keys on. Perhaps like this old window only with the shelf at the bottom.
source
Ok, now that I gave a plan, I can start. First up is to find something for the litter box. I was in IKEA and came across their Trofast.

Hm, it was just the right size and will work as a bench too. I figured I didn't have to use the middle pieces. I grabbed one and came home with it.

I took the curtain down I used to hide the litter box and shelves and pulled all the stuff out.

Of course in doing that I noticed how scratched up the walls were. (Thought process....I think I need to paint...do I really want to paint?...yes, it needs it... I don't want to buy paint...surely I have enough already?)  I found a gallon of the living room color and about 3/4 gallon from the master bathroom closet redo a couple of years back. Ok, those will work!

So much for an easy refresh. The whole laundry room is getting a fresh coat of paint and I have stuff to go through and get rid of. I'll be working on it the next week or so. In the meantime, the breakfast room window seats are full of junk useful items.

And in case you're wondering about the gallery wall, I have a couple of minor things to take care of (while paint dries, perhaps?) and then I'll be able to share it.

I've always said I have decorating ADD and I think this proves it...I can't finish one project before I jump into another. Please tell me I'm not the only one who does that!


Monday, August 26, 2013

Laundry Room Mostly Done

I won't say the laundry room is finished but the major work is done. Here's the rundown on the last big projects.

The beat-up, plain-jane, hollow core door replaced with an old door with peeling paint and windows:


Frosted windows  to read "Laundry Room" and "Staff Only":


I used etching cream and got so-so results. Too streaky for my liking. Bruce got the Frosted Glass spray paint and went over the windows giving me a nice even finish.... have I mentioned before how awesome my husband is? He's the best!

Replaced the modern door knob with something with more character. I found these on EBay and much to my delight, won the bid.


The white porcelain knobs and plates are just what the door needed to finish its makeover. Now the entry to my laundry room looks like this:


Painted the little dresser and made a window covering. The dresser was pale yellow and smelled. I painted the whole thing inside and out to seal away the odor. Mission accomplished! I wanted a crackle finish on the outside but it was a colossal fail. It looked awful. Too much crackle. I scraped as much of the paint off that I could and put it aside to dry.

Pondered the window....it sits right next to the shelves so I knew fabric wouldn't work well since there was lots of fabric next to it. Wood shutter? Roman shade? Or how about wood and tin? Yes, that's it!...I told Bruce my idea. He said I should be able to do it. I laid it out and ask him to cut my wood. Next thing I know he's building it for me. (I told you, he's awesome!) Now I have this:
Closed

Opened

A few things hung on the wall - glass etched sign and old wash board:


and the change jar and new clothes pin bag:

Back to the dresser - it got painted in Behr's "Red Pepper" and it crackled just enough. Rustic wood back added so I can hang stuff on it like my old funnel to hold string:
Yellow inside!


Old funnel to hold string


For fun lighting - Lantern with twinkle lights:

I am recovering my mom's ironing board my grandfather made her and pulling out some baby clothes to hang on the wall.  I also plan on making a large laundry sign, adding a shelf above the washer, and a screen to place around the water heater. But on the whole, it is done. My laundry room makes me smile now. It is organized and clean but most of all fun!

To read about the whole process, go here, here, and here. To see the final projects,  read about it here.

Party links here:
A Joyful Cottage: Every Room In House Party
DIY Showoff that-diy-party
Life On Lakeshore Drive Bouquet-of-talent-link-party
Farm House Porch Welcome-to-scoop-84
A Stroll Thru Life 179th-inspire-me-tuesday
The Dedicated House Make-it-pretty-monday-week-64
Coastal Charm Nifty-thrifty-tuesday-no177-and-my-four
Kammys Korner trash-2-treasure-tuesday-link-party_26
The Shabby Creek Cottage Transformation-thursday-no-219
French Country Cottage feathered-nest-friday_29
Rooted In Thyme-simple-sweet-fridays-78

Wednesday, August 21, 2013

The Continuing Laundry Room Make-Over

The make-over continues:

I decided the shelf area needed a curtain, so in keeping with my color scheme, I bought a grey full-sized sheet, cut it in half, hemmed the raw edges, and then stenciled words in yellow:


Sorry about the wrinkles - I still don't have an iron at the farm; after all, who wants to do "real" work?

The broom "closet" also got a curtain. I found the fabric at Wal-Mart - it's really more yellow than it shows in the picture...


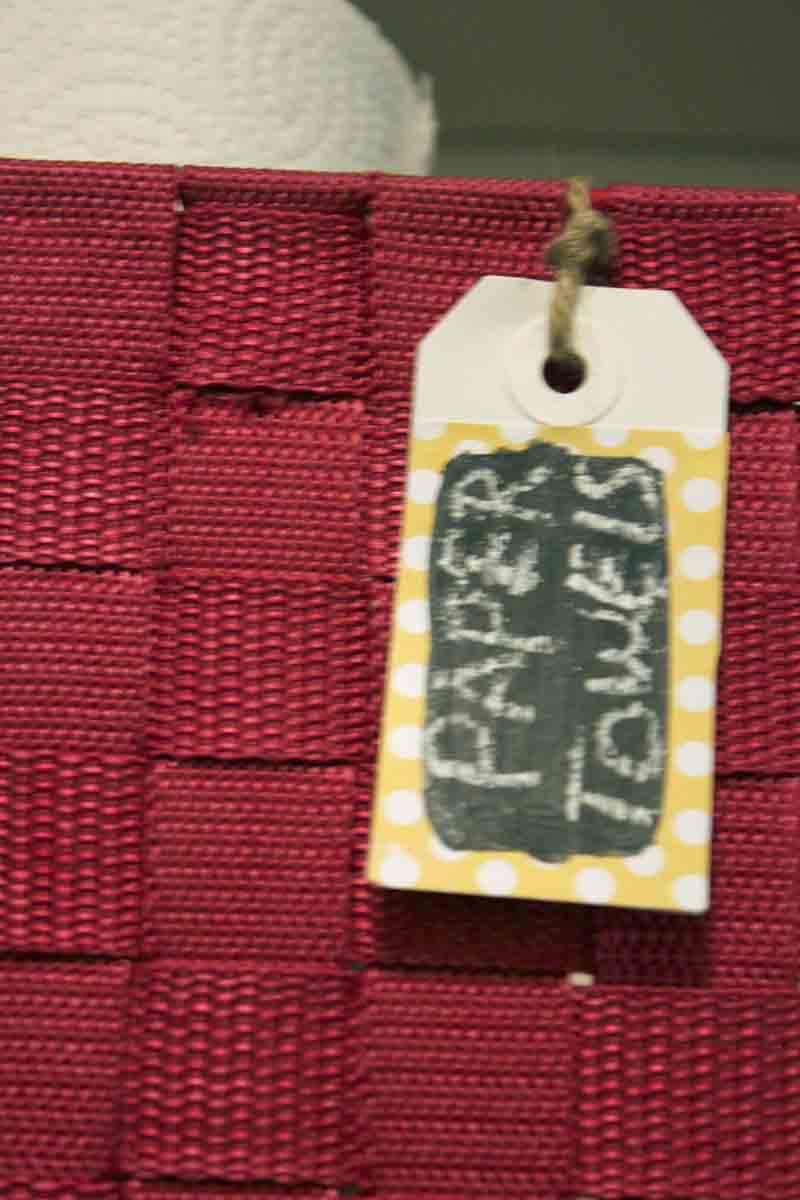
I found these great red fabric bins at Garden Ridge; some were even on sale. I added my chalkboard tags, tying them on with twine. I am currently looking for a chalk marker so I can write neater than the chalk stick lets me write. Hobby Lobby carries what I want but they've been out.


I can clip the curtains open with my cute decoupaged clothes pins:


I'm excited how it's coming together. I really like that I can hide the broom, mop and ladder away.

And this finally came in the mail:


I'll be adding it the next time I go. It's going on my "new" door. Here's a sneak peak of it:

Nice chippy paint, frosted windows...


I'm getting down to the fun part of the room makeover. All I can say is I am gathering quite a bit to take up with me the next visit and working like crazy to finish what I can here.

Still more to come!

:o) ,
Cecilia
The Shabby Creek Cottage transformation-thursday-no-218
Posed Perfection All-things-thursday-blog-hop-7
Savvy Southern Style wow-us-wednesdays-132
Life On Lake Shore Drive lets-party-at-bouquet-of-talent

Monday, August 12, 2013

Farm Laundry Room Wall

This weekend I got the laundry room painted - walls, trim, and shelves. Yay!! It looks fresh and bright.

And because I got all the painting done, I was able to get the accent wall done ( thanks to my husband for his help!). When I began planning, I wanted to do something to the walls that would give it some interest. I thought of beadboard or a rough plaster texture but I wanted a more rustic look. Rough wood planks (as in old fence pickets) or what I really, really wanted was rusty tin. Unfortunately, I didn't have enough old fence pickets or somewhere to get rusty tin for either option.

I had just about decided to go with beadboard when I just happened to mention the rusty tin idea to one of my sisters. She said she knew where she could get some, so how much did I need? Yes! I quickly measured, told her, and in a few weeks had some tin panels. Perfect...only they weren't rusty. She told me the rusty ones were too far gone so she decided to bring me these. Ok, I can rust them myself. So I googled "how to rust tin" and got started.

I must admit most sites said the best way to rust them was to use muriatic acid as you have to get rid of the galvanized treatment first. I was stubborn though and (can you read scared of the acid?) decided to proceed without it. Fail - no rust. Ok, so what is corrosive yet "safe"? I know! You read about how cola can eat through all sorts of things so I promptly took a small piece of tin and sprayed it with cola, reapplying it to keep it wet for a day. Rinsed it off and sprayed it with the vinegar, hydrogen peroxide, and salt mixture and set it in the sun to bake. It actually developed some rust. Hurray!

That weekend at the farm,  I laid out all the big pieces and sprayed them down with cola.


No rust. Had to come home. Next trip sprayed them again. Again, nothing although they were losing their shine.  It was time to leave. Sigh. By now, I was getting impatient. I wanted to get them rusted so I could put them up - yet I really wanted this method to work. So I sprayed them one last time and left them out to bake in the sun.


When we got to the farm this past weekend, I ran out to look at my tin...no change. Rats! I then told Bruce to go get some muriatic acid. He did a happy dance. (Ok, not really. But he was nice enough not to say "I told you so"). And he was nice enough to spray the panels for me. It works quite well and very fast. The next step was to rinse it off and spray it with salt water and ta da! Rust! So if you want to rust galvanized tin panels, take my advice - just start with the muriatic acid. Save yourself some time.

Of course, while he was doing that, I was painting and getting the room ready. I pulled everything out (yikes):
Was I planning on using the kitchen?...must not have been as I piled everything in there!


A big mess
And painted away:


Walls, trim, and shelves all got a fresh coat of paint.

Here's the tall shelf unit with the bottom 3 shelves knocked out to make my broom "closet":

broom "closet"

With that done, we started putting the tin up ( or Bruce did with a little bit of help from me ). We finished it off by topping it with some old fence pickets. Now I have the coolest looking wall!


Bruce actually found a tin outlet cover but he had to extend the outlet out first. I forgot to take a picture of it after he was done. Of course.

I really do love the way it looks! It is the perfect rustic look for my farmhouse laundry room. Next up is the "new" old door, organizing the shelves, painting my small dresser, plus some artwork for the walls. I am also trying to decide whether or not to build a screen to hide the water heater...what would you do?

Until the next visit,
:o)
Cecilia

Linking to these fun and fabulous parties:
The Dedicated House Make-it-pretty-monday-week-62
DIY Showoff That-diy-party
Life On Lake Shore Drive A-bouquet-of-talent-linky-party-time-48
Coastal Charm Nifty-thrifty-tuesday-no175
Lavender Garden Cottage -Cottage-style-party-worlds-longest-yard
A Stroll Thru Life 177th-inspire-me-tuesday
Farmhouse Porch Welcome-to-farmhouse-porch-and-scoop
Brag About It Link Party on VMG206
Savvy Southern Style Wow-us-wednesdays-131
Lewisville Love Tips-and-tricks-tuesday-link-party
Stone Gable Tutorials-tips-and-tidbits-61
Posed Perfection All-things-thursday-blog-hop-6

Springtime Projects 3: Have A Seat!

It might still be Spring, but here in Texas, things are starting to heat up and feel like Summer. I knew I needed to get the last of my Spri...