Showing posts with label repurposing. Show all posts

Friday, June 2, 2017

Trashy Tales - A Croquet Holder


I've a trashy tale to tell.  Let's let it be our dirty little secret, 'k? 😉 Read on to hear how I brought home the trash and turned it into treasure! Welcome to Creative Friday!

Remember that the last time I was in Canton, I found this croquet set? It was complete but no holder for the pieces. I figured I'd just find some kind of box to put it in. (this isn't trash)

The next week, I'm out on my walk and spy this in the trash (however, this definitely is trash!).

Oh yeah, it came home with me. Hm, I see why they threw it away. The mallets were falling apart and there was plenty of rot happening. Could I salvage any of it? After a good scrubbing, I noticed two of the mallets were ok plus a couple other pieces would be usable. I knew then what I'd use it for!


Enter the croquet set holder! I know, right? What's better to hold a croquet set than actual croquet pieces?

First, I had to make a box. Digging through my stash of old pickets, I found two in reasonable shape. I figured out the size I needed, measured, then pulled out my trusty Ryobi circular saw. I carefully cut my pieces. Next up I drilled two holes in each side piece to hold the mallet handles.

Then I made the box - front and back nailed onto the bottom, then attached the sides.


Last, I slid the mallets in.

To hold the mallets on, I marked the handles where they came out of the side pieces,

Then pulled them back out and drilled a small hole to hold a piece of dowel rod old paint brush handle.
(I didn't have any dowels the right size but I have plenty of worn-out paint brushes! I cut them to size.)

 I then replaced the mallets and inserted my paint brush pins to keep the mallets from slipping out.

Now the game mallets can sit between the mallet handles and the balls fit in the box. The wickets also fit over the trashy mallet handles.


I'm rather proud of my croquet holder.  Not only did I repurpose some trash to something useful, I have a unique holder!

Happy to be sharing here: Vintage Charm Party

Friday, March 17, 2017

Creative Friday #6 - Repurposed Shelf

It's another Creative Friday! This week it's all about a project for the laundry room at the city house. Come see what I did!

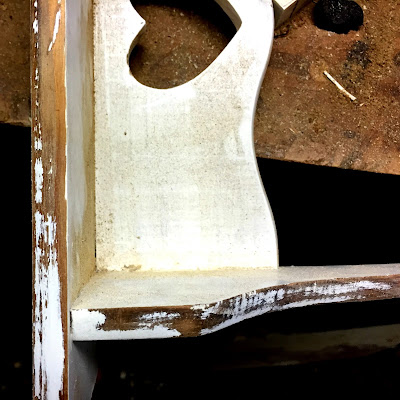
Remember the heart shelves from the 80's? I found a couple at the thrift store some time back. They are great little wooden shelves - though dated. The first one I took apart and used it to make a sign for the guest room. It is fun and whimsical.

The second one is just the right size for the laundry room. However, I wanted to give it more of a farmhouse look.

 The first thing I did was sand the glossy white paint off on the edges and sides:

Next, I cut an old fence picket to fit between the supports (making sure it covered the hearts up) and over the shelf. After sanding them, I glued and clamped them on, leaving it to dry overnight:

 The next day, I brought it in and add screw hooks:

As you can see, the top board is sitting on the original shelf. I added a couple of screws to make sure it stays on.
It's great I didn't have to take the shelf apart to achieve this look. I don't mind the original shelf showing under the new one. I think it adds character. 😀

It sits right by the door going into the garage so it's perfect for extra keys. A little chicken wire basket on the shelf holds string or whatever.
I love how it turned out. The hearts are gone and it looks old and farmhouse-y! Plus, I was able to repurpose an old discarded shelf and a fence picket. A win-win as far as I'm concerned.

Also, I got this in the mail - it's from Kris over at Junk Chic Cottage. She's in the process of moving but still had time to share these cute Spring bags with us and I won one!
I know just where I'm going to put it. (Stay tuned!) Thanks, Kris!

I'm sharing at these fabulous parties:

Monday, June 24, 2013

Juggling Several Projects At Once

I am working on several projects at one time ... Why do I do that to myself? haha. I guess it keeps me from getting bored and I feel like I'm getting more done.

I actually have a list so I can mark them off as I go. My plan is to get as many done as possible before Friday.

I have these that need a new paint job - some will be going on the wall in the guest room:


I plan to paint the covers of these and use them for display. Later, I will repurpose some for the holidays.


This is going to get a label and will be added to the bottles on the bathroom shelf:


This is going in the bathroom to go with my other dog things:


These will also get painted and will hold my travel pictures. It will be easy to switch them out:


This was $2 at the Habitat Restore - I'm thinking chalkboard:


And this could also be a chalkboard message board or maybe a recipe holder. I love its shape:


The clock will get new works and a fresh coat of paint. It is going on the mantel:


These will be made into a garland for the 4th of July and will stay for the summer:


 along with this:

I'm thinking of taking out the candle and placing starfish inside. Nice and summery!

Then there's this chair of my daughter's:


I'm recovering so it will be fresh for her new apartment as she starts her new jobs. She just graduated in December with an Art Degree and has gotten two jobs working in two museums. We are so happy for her!  She picked out this fabric:

It is a chenille type; soft and nubby.

Then there's this:

I can't tell you how excited I was to find this at a local antique store (cheap too!)...it has the windows I was looking for plus peeling paint:

Oh, I have grand plans for it! It will replace my plain, beat up, hollow core laundry room door. I am so EXCITED!!

All of this besides my painting. I am working on a portrait right now plus some just for fun paintings.

Fortunately, most of these are small projects and go quickly. But, yikes! I may need my head examined.

How about you? Do you work on multiple projects too or am I just crazy?


Monday, April 8, 2013

Worn out Parson Chair to Fabulous Desk Chair

I finally got the chair done! It was quite the pain  fun to work on. I'm happy with it although I probably would not want to make another one ever again anytime soon.


Remember the chair used to look like this:


Scuffed, torn, and needing help. I primed and painted the legs and there it sat for 2 weeks. Waiting....waiting for the ugly to be recovered...waiting for a new lease on life...

But now the wait is over and it is sporting a new slipcover, again useful and loved.

It only took me a day to make the slipcover -  I used a canvas drop cloth...it's fairly cheap and a good sturdy fabric. A 9 x 12 size was $10. Not bad and it gave me lots of extra if I messed up.

I wanted to put some type of graphic on the fabric that would appeal to Mr. B since it will be mainly for his use but I also wanted something vintage so it would tie into our bedroom. I found these graphics from The Graphics Fairy - Vintage-Advertising-Clip-Art-Antique Bicycle and  Vintage-clip-art-cute-bicycles.. We like to bike so these were perfect! I also used some others/ came up with my own that I put on the front.( Oops! I forgot to flip the words in the ones I made...oh well, the ink is so light it really doesn't show except for the one in the lower lefthand corner.)

  I saved the graphics to my desktop, opened them in Photoshop Elements, and flipped the images horizontally. Voila! Backwards images  ready to run through the printer.

Next, I cut a piece of freezer paper the size of a sheet of paper and using double stick tape, taped the two pieces of paper together with the dull side of the freezer paper facing the regular sheet of paper. (Very important that the shiny side is right side out!)  I placed the paper/freezer paper combo in my printer, plain paper side up, which printed with the image on the freezer paper. ** Ink will be wet!

Laying it carefully down ( so ink won't smear) on my chair fabric, I ironed ( no steam ) it on. I carefully peeled the regular paper up - leaving the freezer paper stuck onto the fabric. Then I rubbed over the image with a smooth end of a paint brush. Next, I slowly peeled the freezer paper back. Image transfer complete!

My printer is getting low on ink so the image looks worn and faded. Perfect.
Back Graphic

Repeat for other images.
Front Graphics - I made it look kind of like an ad page


 Then I started sewing -

Seat bottom to sides and front apron. So far, so good.


Then I messed up...my chair has curved sides on the back and I just cut those pieces straight. Ugh, bad idea. It took a lot of adjusting, pinning, pulling off, putting back on, and resewing to finally get it right...and it still had a piece that was off. Sigh.


Being in a hurry to finish it, I tweaked it to work. I don't recommend doing that however. It threw off the bottom fit. So more tweaking. Double sigh. Finally got the slipcover sewn together and added a skirt. It turned out ok; just don't look too closely at the crooked places. LOL.
Cats kept trying to sit in it while I was working on it/taking pictures


back of chair
Missy and Pippin like it!


It now sits at the desk and Mr. B won't have to pull one of the bigger chairs over and mess up our sitting area. Not bad for a $6 chair and $10 drop cloth.


Hope you have a fabulous week!

Linking up at these great parties:
A Stroll Thru Life: 159th-table-top-inspire-me-tuesday
Kammys Korner trash-2-treasure-tuesday-link-party
DIY Showoff that-diy-party-11
PJH Designs One Of A Kind transformed-tuesday-33-features
The Dedicated House Make-it-pretty-monday-week-44

Springtime Projects 3: Have A Seat!

It might still be Spring, but here in Texas, things are starting to heat up and feel like Summer. I knew I needed to get the last of my Spri...