Monday, April 24, 2017

Wagon Fairy Garden

I have my mom's old wagon. The plastic wheels on it finally deteriorated and when I couldn't find replacements, I just stuck it out of the way until I decided what I wanted to do with it. When I wanted to make a fairy garden, the wagon instantly popped into my mind as the perfect container for it.

It sits on my concrete bench out front perfectly. I filled it with soil and added plants. Next, I took my fairies I added magic to and started placing them in the wagon.

First I put a pedestal then added a lantern on top of it to make a castle. The sleeping dragon keeps guard while the pink fairy sits inside.
 Someday, I'm going to fancy up the inside of the "castle" but for now Miss Pink Fairy has a soft moss bed.


Next, I took a wooden miniature birdhouse

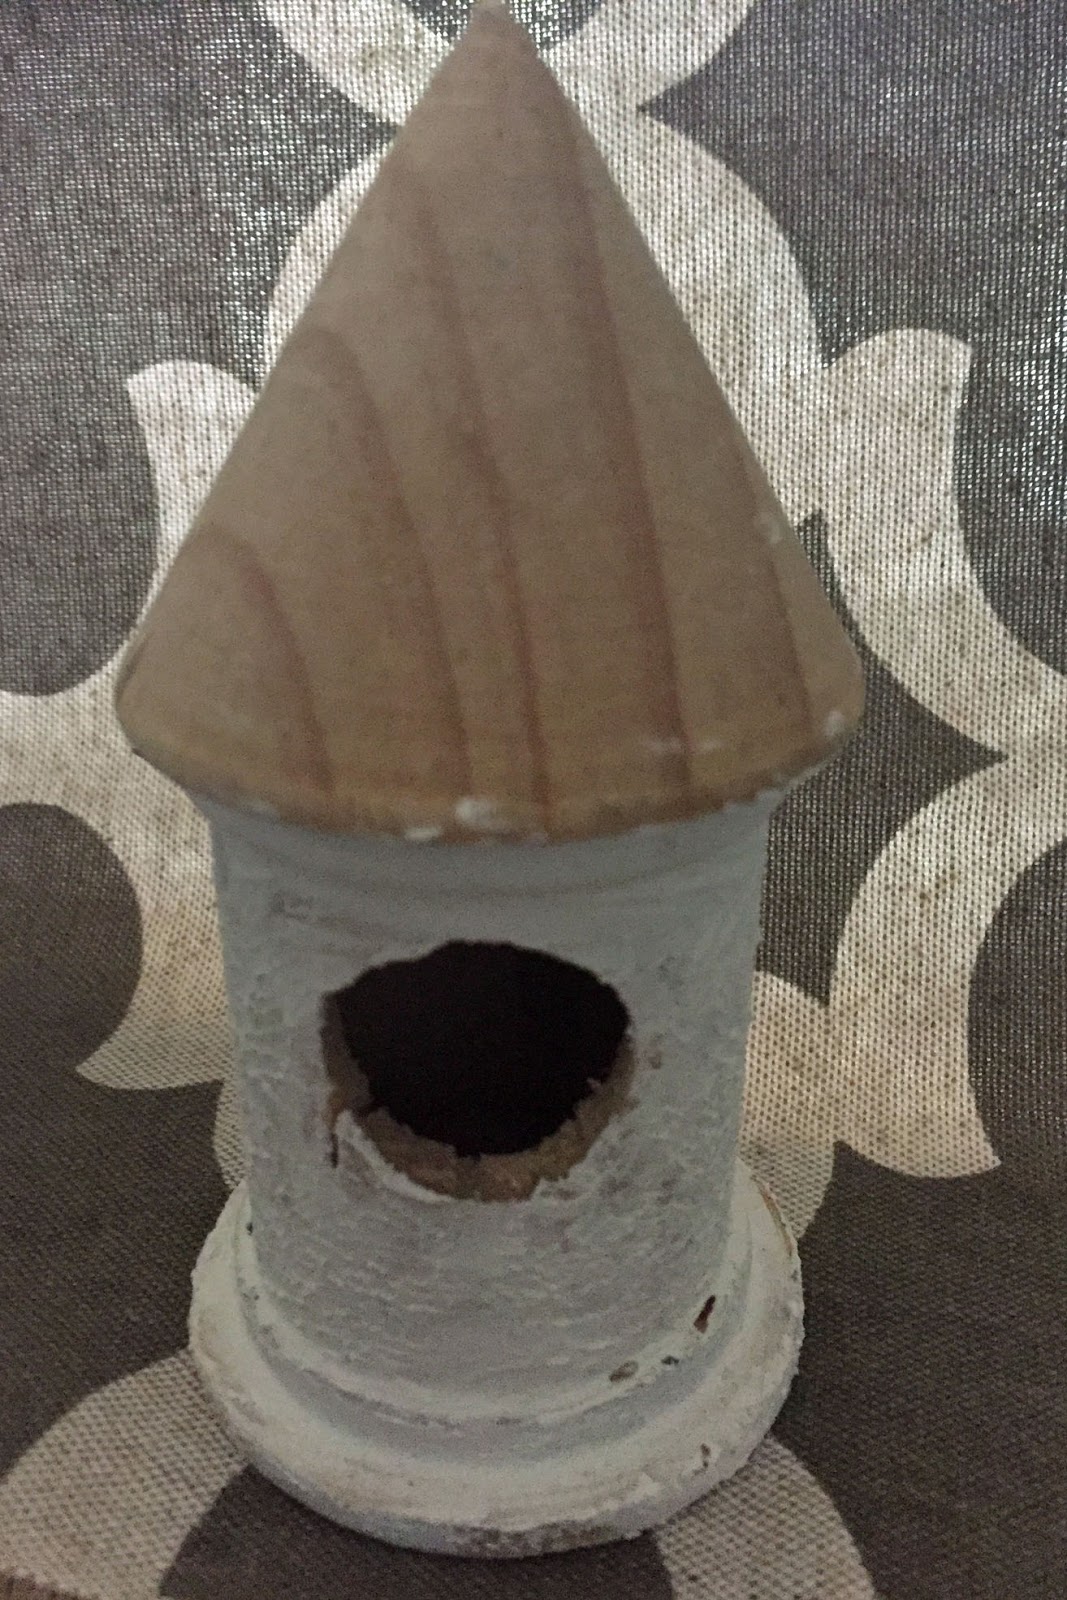
painted it to look like stone and added pinecone shingles and a cork door

and placed it on top of the candlestick with the fairy and turtle. Into the wagon it went!

A white picket fence (to keep the dragon out) and mushroom mailbox was added as well.


 Is that Snail Mail being delivered? Why yes, yes it is! 😀

And Toad and Sweet Fairy enjoy their spot among the flowers.

The mushroom house was next to go in

The potted grass is decorated with cute red polka dot mushrooms

I added some cork and acorn cap mushrooms close to the dragon

A bunny farm sits on the window ledge across from the fairy garden - after all, bunnies are afraid of dragons!


The gnomes are still waiting on their home as well as the fox. Then I have this fairy a friend gave me. She told me she knew I could make her look good.
Yikes, time to break out the spray paint primer!
Oh, much better already! However, she must wait her turn...there's a gnome way ahead of her!

I had a lot of fun creating my fairy garden. Hmm, now where is the gnome garden going to go?


Friday, April 21, 2017

Creative Friday #10: Jumping On The Farmhouse Wagon

Welcome to Creative Friday #10! I jumped onto the farmhouse wagon this week with my pillows.

The sofa pillows at the farm needed new covers as the rusty red wasn't working for me anymore (I forgot to take a before picture heh). Then in Hobby Lobby I found the perfect fabric!
It's a winner! Love all the different farm graphics.

A couple of yards came home with me and I got busy sewing up my pillow covers. (I make covers that are like a pillow sham - overlapping in the back - then I can change them out easily).
The original pillows are a purple plaid (I buy the cheapest pillows I can find at Ross knowing I'm going to recover them so it doesn't matter what they look like).

The back is two pieces that you overlap:

First you sew a hem on one edge:

Then you lay the pieces right side together, pin them, and sew all the way around.

Turn inside out and put pillow in.
 OOPS! Somehow I didn't overlap the sections right so that the bottom is going over the top section instead of vice-versa. (And I did it on both of them - grr) I must have been tired.

Good thing that's the back and the front looks just fine! Works for me (I hate ripping out seams).

In spite of my slight boo-boo, I like the way they turned out. They're going to look great at the farm and I like that the farm graphics aren't too over the top. Just the right touch! And that's a wagon I can hitch a ride on. 😉


Wednesday, April 19, 2017

Wedding Planning - Designing a Dessert Table


Today, I am teaming up with Oriental Trading Company to show a mockup of the dessert table for my daughter's wedding. They have a wide variety of products you can use for your big day all at very reasonable prices! You can go to their website to check out all of their fabulous wedding decor products!

I had Megan come over and go through the wedding decor with me. Her wedding is boho inspired with a touch of glam.
Here are our top picks:
Oriental Trading Company Wedding Decor


On the day we decided to put together the mockup, I got busy - I baked a small cake, bought cookies and brownie bites for the trays, and set up a table with a white table cloth and brown craft paper topper.

Megan cut some gold metallic wrapping paper to fit inside the wood trays

We stacked them smallest to the largest, using upside down bowls to raise each tier up...we'll use something to make it more permanent for the actual reception.

Metallic Gold String Chargers became a table runner, adding a touch of glam to the tabletop

The pretty turquoise napkins add a bright pop of color

Of course, we will have these personalized for the wedding with their names and date. But isn't the saying cute? "Eat, Drink and be Married" And the color is perfect!

 We placed the cake on the middle charger with the glass milk jug vase behind it to the side

The vase was filled with gold striped straws and a couple of the celebration flags - it's the perfect size!


Megan made paper flowers to fill a vase to which we added another flag


She is going to make all the flowers for the wedding (along with some help from family and friends). Love her color choices! She did an amazing job on her first bunch!

Wine and glasses were set on the charger to the left of the cake

 I had her slice the cake 😊


Her cake is going to be "naked"....she's not a big fan of icing so this is perfect for her. Dylan is thinking his cake might be that way too.


 How pretty it all looks - we can now replicate this on a larger scale.

We'll buy more of the scalloped wood trays - they hold the small bites of dessert perfectly!

The gold chargers are going to be perfect under dishes and vases - they will really help show them off

The celebration flags will not only be on the dessert table but also on the other tables - they're so much fun!

And Megan loves the sparkly Mr. & Mrs. banner!

Megan and I had fun setting up a dessert table using the pretty wedding decor from Oriental Trading Company. We're excited to have some nice and inexpensive options for decorating and can't wait to use our Oriental Trading products for the reception!


Disclaimer:I received free product in exchange for writing this post. All opinions are my own and not influenced in anyway. 

Partying here:
SaveSaveSaveSave

Springtime Projects 3: Have A Seat!

It might still be Spring, but here in Texas, things are starting to heat up and feel like Summer. I knew I needed to get the last of my Spri...