
Of course I took full advantage of my time there to decorate the farmhouse for Christmas. I had stuff everywhere while I worked. I put out the Christmas candles, decorated the mantel and entry table, and of course, the tree.
In a previous post, I shared my twig stars and acorn bells. You can see that here: Theme For The Farmhouse Tree. Here's how they look in the tree:


I also took some pinecones and either added glitter or "snow" to them.

The red felt reindeer came from Wal-Mart and I added a few ornaments I already had that were nature inspired like the olivewood nativity.
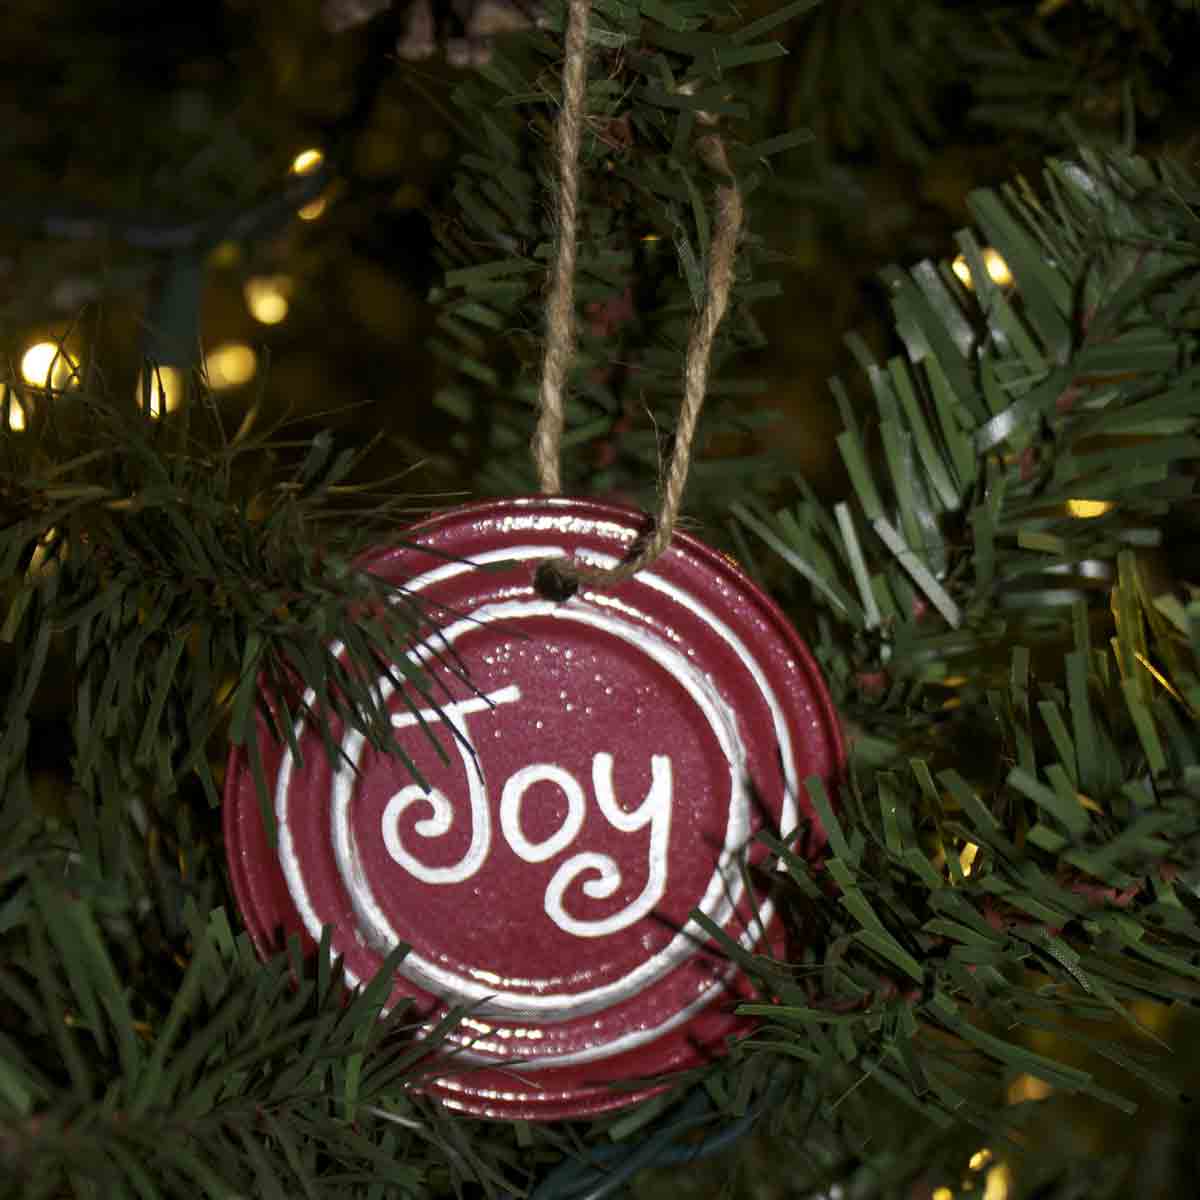
I have also been saving can lids to make ornaments. To make, I spray-painted them Hammered Red, punched a hole in them, added a twine or ribbon hanger, then added different sayings and designs using a silver Sharpie paint pen:


Then I made the cutest felt owls:
 |
| 3 of my felt owls |


I think they turned out oh so cute and they add a sweet touch to my tree.!
The lights are the most expensive thing on the tree - I bought the warm white LED lights - I like how they look and the warm glow they give off!
I am very pleased with my natural and rustic theme. Best of all, I didn't have to spend a great deal of money and got to reuse things that would otherwise have been trash!
I hope you'll join me over the next few weeks when I'll share the other decorated areas in the farmhouse and my favorite Christmas cookie recipes.
I hope you are having a wonderful week filled with Christmas cheer!
Joy From the "B" Farm,
Cecilia
Linking to these great parties:
Life on Lakeshore Drive Christmas Blog Hop & DIY Christmas Ornaments
DIY Showoff: DIY-Holiday-Highlights-3
Savvy Southern Style wow-us-wednesdays-94
The Dedicated House Make-it-pretty-monday-week-26
Family Home and Life wow-us-wednesday


Hello, stopping by to visit you back :) I also have a link party on Wednesdays if you would like to join up with us. Thanks for stopping by.
ReplyDeleteThanks for visiting back! I'd be happy to join your party. Looking forward to it.
DeleteVery cute. I am a nut for anything twig. :)
ReplyDeleteThanks, Barb. I only made 3 of those twig stars...they were a lot of work!
DeleteI love he country ornaments. We've decided to put up a tree in our Vermont house, but maybe on the deck and some of the more rustic ornaments would be perfect! Thanks for the ideas!
ReplyDeleteYou're welcome! Glad you decided to put a tree up, up there. I like the idea of it on the deck. Please share!
DeleteCecilia, those are the cutest little owls!
ReplyDeleteThank you! I am rather partial to them myself - I love owls and these are just plain old cute! :o)
DeleteCecilia...I love all of the ornaments..they are all so cute and creative, but I must say that the can lid ones are so cute!!!...Great idea!
ReplyDeleteThanks Shirley! I am pleased with how they turned out. Wasn't sure where I wanted to go with them but I'm liking how they look. They give the tree just the right bit of color too!
DeleteLove the can lid ornaments, great idea!
ReplyDeleteThanks Sarah! I thought it was a good way to reuse something that would have been trash. Round = ornament, right?
DeleteOMGosh! The owls are the cutest things!! Thank you for sharing and thank you for the visti and sweet comment at The Dedicated House! It means the world!! Would love it if you would share this at my Make it Pretty Monday party at The Dedicated House which goes live at 8am CST on Monday. http://thededicatedhouse.blogspot.com Hope to see you at the bash! Toodles, Kathryn @TheDedicatedHouse
ReplyDeleteThanks for the visit back! Can't wait to share at your party. :)
DeleteOk - you're seriously talented Cecilia!!! And I'm most definitely copying some of those ideas - your star is just gorgeous!
ReplyDeletexxx
Thanks! Glad you like them. :D
DeleteCecilia,
ReplyDeleteThanks so much for visiting my blog and leaving a comment. I love your tree and the fact that you thought outside the box by recycling items. They turned out adorable. Especially love those owls!
Thank you Mary Anne! I had fun figuring out what to do with those lids. I love my owls too. They were easy!
DeleteI love the owls, they look easy enough. I may try a few
ReplyDeleteJanice
Janice, they are easy! Cut out the shapes, place eyes on body front and stitch, glue centers of eyes on, glue beak, put wings in place then do a running stitch around body leaving an opening for stuffing. Add some stuffing then finish stitching. At the feet, make vertical stitching for feet. Add hanger. Done!
Delete