Showing posts with label Christmas ornaments. Show all posts

Monday, December 11, 2017

When An Act of Kindness Is Repaid ( & More Holiday Decor)

I did a pet portrait of Cooper for Kris from Junk Chic Cottage (last year?). Saturday I got a surprise as a thank you from her. When I opened the box, I found these:
There was a sweet note and candy canes too!

Oh my goodness! Cuteness to the nth degree! She got a striped candy cane family to go with my candy cane theme at the city house 
Stripes and a hoodie! Too cute!

and a woodland family to go to the farm. 
I love their caps!

They are from Target and there are 12 different ones. Kris has the white ones (which are beyond cute the way she styled them. You can find them in this post). They have little metal tags with the year on one side and their name on the other. How cute is that?
They are searching for the perfect perch where they can spread happiness. They make me smile! I wasn't looking for something in return for Cooper's portrait, but my heart is full. Thank you, Kris!
--------------------------------------------------------------------------------------------------------------------------
 Last week, I shared my cozy farmhouse tour. Today, I'd like to show you how I decorated the tree in the living room plus other bits and pieces around the house. Then I want to share a bit of the city house too.

The living room at the farm is small but cozy. We furnished it with 2nd hand furniture since it is not our full-time home yet. I do try to make it inviting although since the fireplace sits at an angle on the wall it makes arranging this room difficult. This is the best layout so far. Some day, I want bookshelves on the tv wall.

I found this cute pillow when I went to visit Cecilia of My Thrift Store Addiction. I instantly knew my cute elf would love sitting on it, claiming responsibility for all the Christmas decor I put out. 

My treasured Santa Mouse book from childhood sits on the side table along with the sweet mice I also found on that trip. I dressed them in Santa hats and scarves.


On the kitchen chalkboard wall, I hung my bottle brush wreath and wrote "Merry Christmas" around it. My coffee station sits below it. You can see how I made my cart in this post.

The dining room window got dressed in a new curtain. I was tired of the black and white curtain I made back when we first bought the farm. Red checked fabric is cheery and says farmhouse to me.

I added the cute ruffle to the bottom of it. I love that it matches the lamp shade on the coffee cart.

Lastly, for the tree in the living room, I made some oversized gingerbread ornaments from old fence pickets. They look so cute on the tree!

There's a church, signs, houses and a barn. They were easy and fun to make - just fence pickets and white paint with a ribbon strung through a hole.

Then moving onto the city house, I pulled out my large Subway art chalkboard I made. It sits above the mantel.

Treasured books from childhood along with a couple of Santas sit on top of the old radio. I painted the Toy Maker Santa many years ago. I have another one with more details I'm trying to finish. It is of Santa and his sleigh with Rudolph and elves. It's slow going but I hope to finish him before Christmas. Then I will add him too.

In the kitchen, I set out my gingerbread men collection. This one sits on the corner shelf above the sink. He has his gingerbread cookie cutter along with a chalkboard sign to remind you to enjoy this season with some yummy treats.

 Lastly, in the breakfast nook, I dressed up my large chalkboard with a garland from Bullseye's Playground and my canning jar lid tree, adding chalk details.

I hope you enjoyed this last bit of Christmas decorating.  I'd like to wish you a very Merry Christmas and Wonderful Holiday Season from all of us at The B Farm!


SaveSaveSaveSave

Friday, November 17, 2017

'Twas The Week Before Thanksgiving

I've been gathering up ideas for Christmas (I might have gone overboard on the plaid...nah)

Picking up goodies here and there, new and old

Planning and working on an ornament painting party I'll be teaching in December - can you tell what they will be?

Working on Christmas projects
All in anticipation of decorating the farmhouse for the Holiday season!

I'm making wooden house ornaments

Wood signs  from old fence pickets - they are going in a special place!

Wooden blocks and a wood sled getting repainted as well

And various other Christmas things I've picked up (these are from my trip to see Cecilia of My Thrift Store Addiction).

these cute mice will be dressed for Christmas soon!

And I've been sewing as well - red checked curtain for the dining room window

And adding length to the shower curtain (we have an oversized shower so a regular curtain is too short).

I hope you've enjoyed this sneak peek at my Christmas decor. Come back after Thanksgiving to see my farmhouse tour which is part of the Cozy at Christmas Holiday Blog Tour!

There are several bloggers sharing Christmas coziness all week long. I hope you'll join us!
SaveSave

Monday, December 9, 2013

Ornament Exchange Goodies!


I was very excited to join in with Vicky from Life On Willie Mae Lane for her ornament exchange.
I received mine shortly after I broke my knee so it really lifted my spirits when I got my box. I couldn't wait to open it and see what I got!

It was from a lady in Colorado, Dee Ann. I believe she is the grandmother of Stephanie from The Enchanting Rose. While not having her own blog, she wanted to be a part of the fun. I'm so glad she did! She sent me the sweetest note along with my well-wrapped ornaments. Thank you Dee Ann - they arrived safely and I just love them!

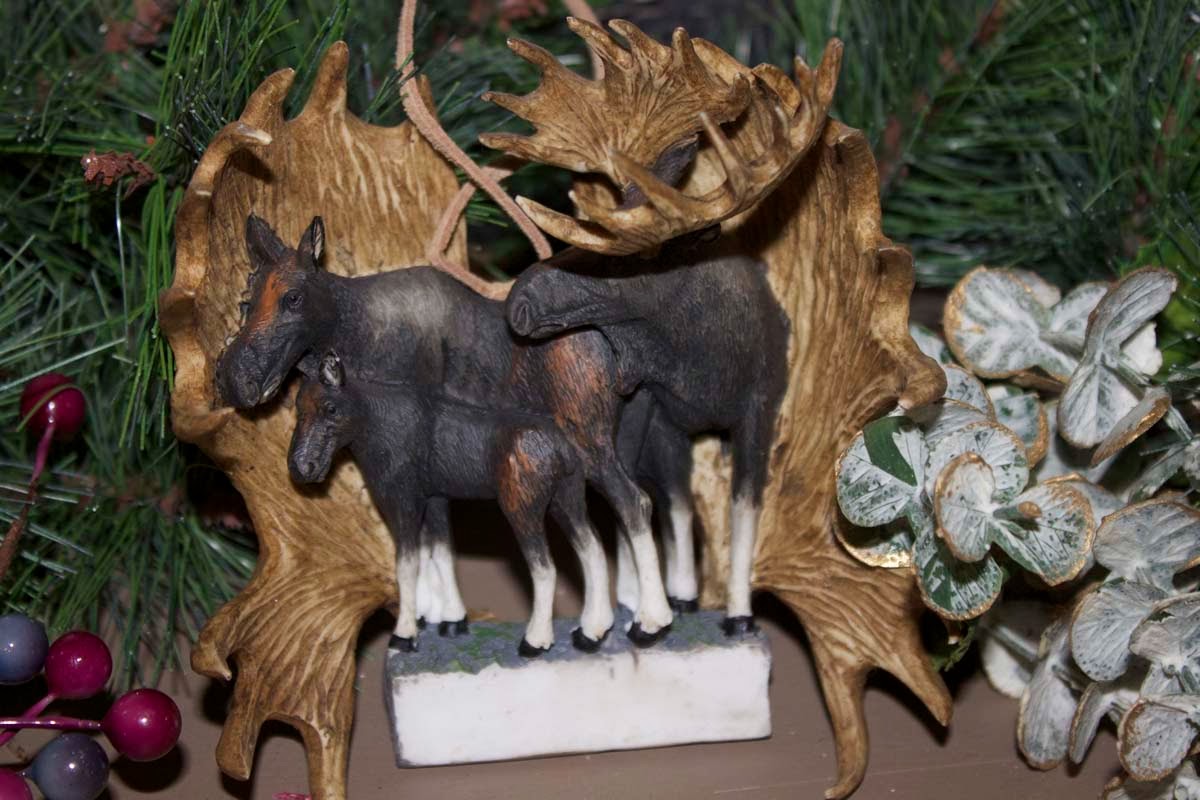
First off, was this adorable moose family. Check out the antlers! Perfect for my rustic, woodland theme.


Next, securely wrapped in bubble wrap, was an adorable glass ornament with  sledding reindeer inside. It is so cute! I nestled it and the moose into the greenery on my entry table - I wanted them both to be seen right away!

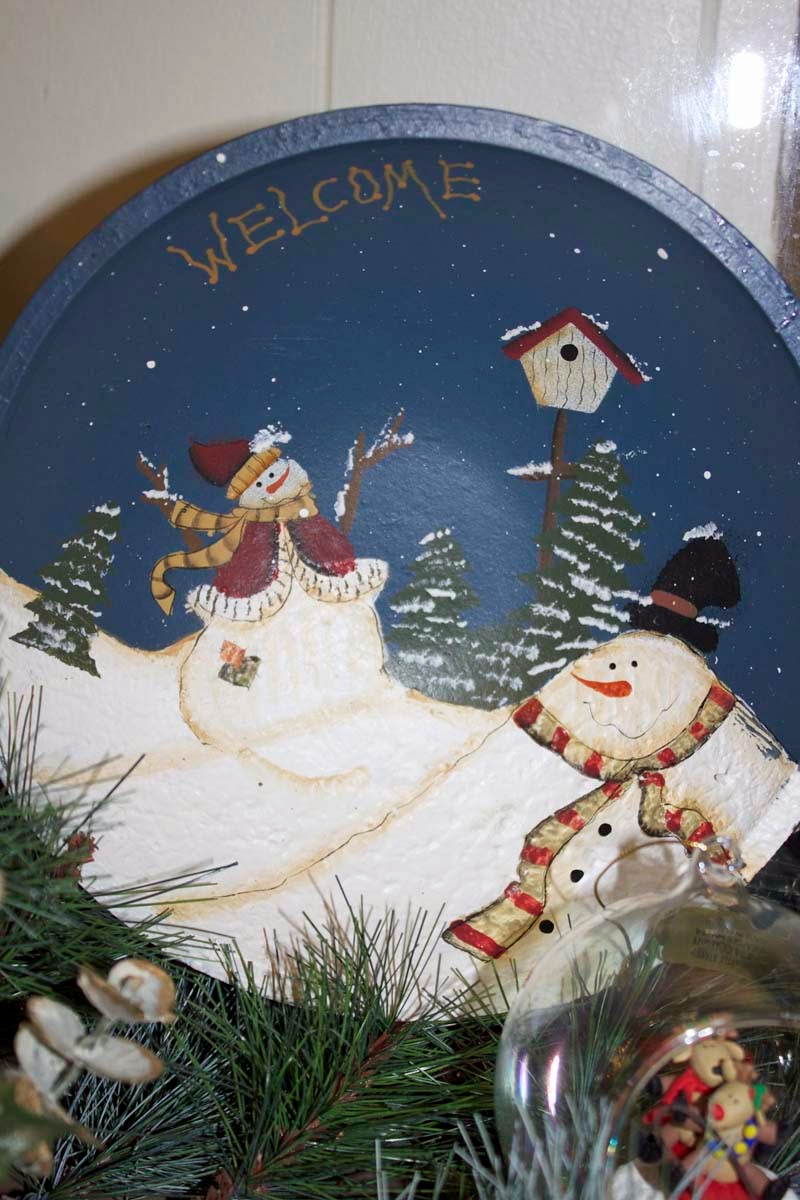
The last item in my box was the cutest wooden bowl ever! Dee Ann knew from my answers, I collect snowmen so she picked this out for me. I just love it! It, too, is on my entry table as it says "Welcome"!


The nice thing is, it can stay out for the rest of Winter and will make me smile even when the days are dreary!


Sadly, I didn't get the moose in this next picture…they are on the other end of the table…obviously I didn't do too well taking this picture either…it's all blurry…sorry about that.


I was excited to learn I had Vicky's name. She was fun to create for and has said the nicest things. Plus she got a special gift from Donna as a thank you for hosting the exchange. :o)  Be sure to hop over and check out all the amazing ornaments and gifts everyone has received. Go here.

Thank you so much, Vicky! This was so much fun to participate in and I can't wait to be a part of it next year!

Hugs and blessings,
Cecilia

Tuesday, November 19, 2013

Felt Owl Ornaments

Last year I decided to do a rustic, woodland theme for the farmhouse Christmas tree. I wanted to make some owls so looked for ideas. In Michael's I found this kit:

Cute owl but the colors were not what I had in mind for my tree. I decided I'd buy it anyway for a pattern. They turned out so cute and I've decided to make more for this year. I've included a tutorial on how to make them. It's not perfect but here goes...


Felt Owl Ornaments

Materials needed:

Pattern
3 colors of felt (I bought brown, grey and off white)
Embroidery Floss or Heavy Thread
Large needle
Hot glue
Scrap material or ribbon for scarf/bow
Twine or ribbon for hanger
Stuffing

Print and cutout pattern. (Sorry, I know there's a way to have the actual size pattern added but I don't know how. sigh, my lack of know-how is frustrating sometimes….This should be about twice this size):

First fold the 1st color of felt in half. Pin on body and cut out. You should have 2 pieces. Fold the 2nd color of felt and cut out the outer eye pieces and wing pieces. Again, you will have 2 of each piece. Finally, fold the 3rd color of felt over and cut out the inner eye pieces so that you have 2. Also cut out the beak from the 3rd color. I have found it easier to just cut a triangle shape on the fold so that when you open it, it makes a diamond shape.

Now for the fun part! Take one body piece and glue the outer eyes in place with a small drop of hot glue.

Thread your needle and double your thread (or more if you want a heavier line ) and sew 8 lines to make a star shape:


 When finished with that, glue the inner eye on. (I used gold thread on mine…should have sewn the lines closer to the edge so more would show from under the inner eye circle.) Also, glue the beak into place.

Next glue the wings on.

Stitch the feet to suggest claws - I make 3 stitches like so:
Bad drawing, I know...


Cut a piece of twine or ribbon for the hanger and knot the end. Glue in place (small dot of glue).

 Place body pieces together and starting between foot and wing, stitch together using a running stitch, leaving the bottom opened. Taking a small amount of stuffing, lightly stuff the body, then stitch the bottom closed.

Cut or tear fabric for bow. Tie bow, glue to owl. Or cut a piece long enough to go around owl and knot in front, gluing down so it stays in place.

All done! Isn't he cute?

Again, I'm sorry for the blurry pictures and undersized pattern. Someday, I'll learn how to do it better, I promise. Please let me know if you have any questions and I'll do my best to answer them.

Cecilia

Springtime Projects 3: Have A Seat!

It might still be Spring, but here in Texas, things are starting to heat up and feel like Summer. I knew I needed to get the last of my Spri...