Monday, July 30, 2018

What's Up? Stuff I've Been Working On While Trying to Stay Cool

Good Monday afternoon! I don't have loads to share - it's been so hot so mostly watering stuff and trying to stay cool.

But, I wanted to share final pictures of the living room and a few of the art studio.

First up the living room - I added baskets to the entertainment unit and hung some of my artwork on the wall. I'm still loving my living room refresh and the burst of happy color!

Entertainment center with baskets added; artwork waiting to be hung on the walls:

Artwork hung on either side of entertainment unit:

Lamp on entry table:
 Here's what it looks like turned on. I like that the Eiffel Tower shows through.

Then we head out the backdoor to the art studio. Bruce wanted someway to know if I was in there without having to walk the whole way so I made a sign to hang outside the door. It is made from a small wooden palette I bought at Hobby Lobby.

I added paint splotches and the words then just added the chain through the thumb hole:
 I hang it up when I'm in the studio - Bruce can just glance up the path and if he sees it, he knows I'm there in the studio and doesn't have to go looking for me. :)

I received this wonderful gift from Kris over at Junk Chic Cottage. The saying is just perfect! Thank you, Kris. I love it!

 I hung it over my small drafting table next to my big easel (to the right - not pictured). It will be where I can be inspired every time I sit to paint.
inspiration for painting with kitten paintings on the small easel

With school starting soon, I found some goodies for my locker - round magnetic bins to hold clips, thumbtacks, etc., a white board for messages, and a locker shelf (it's inside...forgot to snap a picture of it). I'll move the round bins to the side for more of an uncluttered look:

And lastly, I'd like to leave you with some pictures of the paintings* I've been working on this summer:
"American Fishing Shack" 11x14" oil on canvas

"Fairy Tales" 8x10" oil on gesso board

"Woodland Song" 10x12.5" oil on gesso board
 A couple of small paintings for my kitchen gallery wall as well:
 bee and flowers and garden bicycle
both oil

I am working on adding some color to the kitchen and dining room as well.  Here's a sneak peak of something that's getting a makeover:

Thanks for dropping by. See you soon!

*All images are property of Cecilia Bramhall Art. Please do not share or copy.

Wednesday, July 18, 2018

Farmhouse Living Room Reveal

Happily, with some easy upgrades, the living room is done. We still need to tackle the fireplace but at least we have a plan - it's just finding the right time to do it. With hay that needs to be cut and baled, bees that need care among other things, it might not happen until Fall. But that's ok. We will get there.

In the meantime, I want to share how just some simple decor changes really made the room feel completed and cozy. Here's what we started with:
Not awful just kind of blah and empty feeling.

Then KariAnne gave me a great plan:
I liked the touch of blue in the rug but I needed something with some green in it too so it tied into the side table that was painted a sage green ( you can see that in the before photo at the end of the sofa). I liked it and didn't want to repaint it. So I looked at the different options KariAnne suggested but while I was browsing I saw one on sale and I thought it was perfect:
I ordered it (from Overstock.com) and absolutely love it! It is 8x10 which almost completely covers the floor (the living room is pretty small).

I took her suggestions for fabrics and found the perfect solution for the curtains, pillows, and lampshades - I used the red ticking for the Roman shade and one lamp shade, found a red and green plaid for pillows, and a red tone on tone for other pillows. I even had some red floral pillows stored in a closet in the city house I was able to reuse. The plaid and red tone on tone were also used on the bare lampshade to really tie in the colors.

lampshade not quite finished
there! all done

Oo la la


The red tone on tone also became the topper of my curtain panels to make them long enough for the moved-up curtain rod:

KariAnne suggested I add a wooden lamp to pull in more wood elements. I actually had one in the bedroom that was painted a greenish-blue. It ties in great with the rug:
I think the lampshade might need a little dressing up. To pull in the wood elements, I placed this little drop-leaf table in front of the window. I bought this table many, many years ago, stripped off the yellow paint and just stained it.

The entryway area also got some love - I put the table the tv used to sit on back on that wall, added the old door at one end to balance the window on the other side, and then added some red elements here and there. I forgot to take a picture of the small lamp with the red striped shade on the table.  (oops!) That adds in some more red.


The red boots in the old milk crate just make me smile. I paid more for them than I normally would have, but they were worth it.

The "beast" or shelf entertainment unit I had in my art room in the city, got a makeover as well. I'd tried to seal the smell in (it reeked of cigarette smoke) but only partially succeeded - occasionally it would send out a not so pleasant smell.

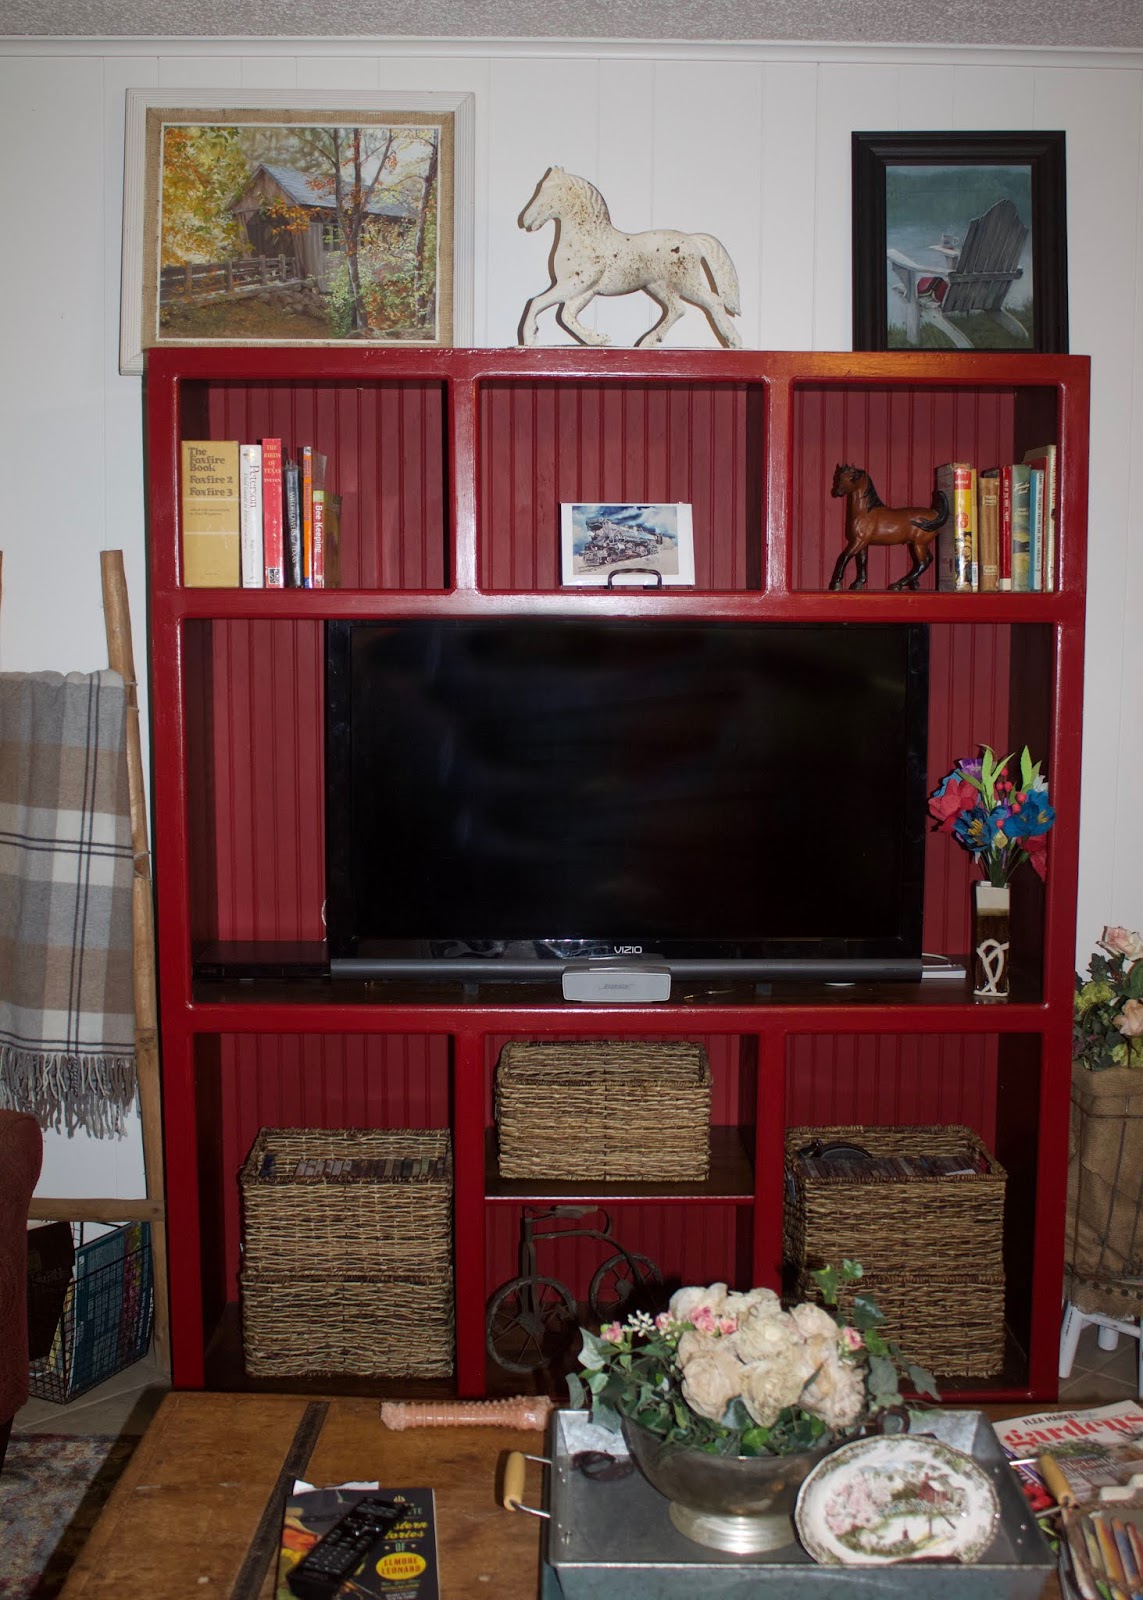
I had Bruce take off the old back (it had holes in it anyway) and that got rid of a lot of the smell. He then cut the center divider out so the tv would fit in the middle spot. Then we put new beadboard on the back - painted it red - then also painted the edges red, sealing the whole thing with polyurethane. No more stink! Ready for how it looks now? Oh good! I want you to see it in all it's new glory!

Doesn't it look great? I love how it gives that wall presence - the fireplace kind of fades into the background now instead of being the center of attention. I bought some baskets to put in some of the cubbies. Well, huh. Someone who shall remain nameless forgot to take a picture after she put the baskets in the entertainment unit and styled the shelves. (cough, cough. I'm sensing a pattern here.)

Finally! The reveal! Drum roll please! Ta da!

 I am actually going to hang some of my own artwork on the wall next to the shelf unit so I owe you all another living room picture after I add them!

I absolutely love the room now. As much as I admire those with neutrals in their homes, I learned the look just isn't me. As an artist, I love color so I need it  - it makes my heart happy. The lesson I learned? Be true to who you are. If you like neutrals - go for it. But if color makes you happy then  you should use it.

I hope you enjoyed my living room refresh! I'll be sure to have a picture of the entertainment unit with the baskets, artwork on the walls and the red lamp on the entryway table soon.

*Want to know what colors I used?
The walls are Behr Ivory Palace, trim Benjamin Moore Simply White.  The entertainment unit is Behr's Apple Polish - it's such a happy red! Not too dark, but not too pinkish either. The end table I  didn't want to repaint is Annie Sloan Chalk Paint in Chateau Grey but it is really a soft sage-y green.

Wednesday, July 11, 2018

Part Three - Living Room Refresh

Welcome to part three of the living room refresh. You've seen the mood board, the rug and pillows, and today I want to share the curtains, roman shade and lampshades.

I originally used patterned tablecloths for the curtains. They had a white background with birds and vines with red flowers on them. I used clips to hang them up. Here's a picture of them from long ago.

However, I recently decided to go neutral so I bought curtains in a taupe color. I really didn't like them in this room. They were too blah for my liking. So when KariAnne suggested a small floral print, my mind went instantly back to the tablecloths. They would be perfect except for one thing - they were going to be too short. 

You see, she also suggested I raise the rod up as high as I could which meant the tablecloths would be 6" too short. What to do? Well, one of the pillow fabrics matched the red in the cloths perfectly. I cut and sewed a piece to each top of the curtains then clipped them in place. Perfect! I think they look great!

Next, it was time to work on the roman shade. I won't go into detail how I made it; there are plenty of tutorials online on how to turn a miniblind into a roman shade. I used red ticking fabric to make mine. It took a couple of days of sewing, prepping the blinds, and gluing the fabric on. After letting the glue dry overnight, I hung it up and wow! It really adds to the whole look. I won't say this turned out perfectly - I already had one slat break (they are metal and old so apparently brittle). I will eventually have do it over but for now this works. I really love the way it looks. Bye-bye miniblind!


Lastly, I covered my lampshades. For the bare metal frame one, I tore the remaining fabric pieces into strips, then hot glued them onto the back of the lampshade rims. It coordinates with the other pieces in the room and adds that touch of color in the corner.

Lastly, I took a small lamp I had, painted the base red and covered the too white shade with the red ticking. The cool thing? The Eiffel Tower shines through the fabric when the lamp is lit!
It adds some red over in the entryway area too.

Next week, I'll share what we did with the "beast" aka shelf entertainment unit and show you how the room looks. You're gonna love it!

Monday, July 2, 2018

Week Two of the Living Room Refresh

Welcome to Week Two of my living room refresh. Last time, I shared how the living room looked before and the plan.  Today I'll be sharing all about the rug and pillows.

One of my very favorite colors is red. It's warm; it's exciting; it's my happy color.

In my living room refresh, KariAnne suggested using it for my main accent color (I'd tried to go neutral and it just wasn't working for me). Here's the mood board again to remind you of where I want to go with the room.

She found several rugs for me to consider over at Overstock.com. As I was looking at them, I saw a different one. Ooo! The pattern on it was very subtle (which I really liked) and it still had all the colors (red, blue, gold, and sage green) I needed to pull the room elements together. Another bonus: it was on sale! So I ordered it!

It came just in time for it to go with us to the farm over the weekend. I love it! The color and pattern are just right. (Hm, I need to pull it out just a bit so the table leg sits on it- heh).

KariAnne also suggested some patterns for pillows - a stripe and a floral. After looking at fabric and trying to match reds, I finally found a plaid and a tone on tone print with the right color of reds. Then I found some floral pillows tucked away in a closet.(Yay for being able to reuse something!) So I got busy, made new pillows from the two new fabrics and plumped up the two floral ones - now I have beautiful, colorful pillows for the living room! Bye-bye neutrals!
 I don't know if you can tell, but the floral pillows have a checked fabric on top & bottom.


The living room refresh is well underway. Next week in Week Three, I will share curtains and a roman shade followed by Week Four featuring the entertainment shelf unit. And finally, I will have a final reveal of my newly refreshed living room!

Springtime Projects 3: Have A Seat!

It might still be Spring, but here in Texas, things are starting to heat up and feel like Summer. I knew I needed to get the last of my Spri...