Monday, September 29, 2014

Porch Decorating For Fall

   I am so behind on getting my porches decorated for Fall but I finally got them done this past weekend.

 First of all, the city porch. Here I don't have to worry about wildlife eating the plants and decor so I placed pumpkins, gourds, and mums:


My metal donkey, Ee-ah, approves:


Gourds in the lanterns:


Then I put my landscape timber scarecrow out I made many, many years ago. He's been freshened up a time or two and probably could stand another refresh but for this year, he's fine. He holds his friend, the cloth black crow:

Do you see Petey, the armadillo? He has a strand of lights inside to make him shine at night.
I love my metal critters.
And that is the city porch.
________________________________________________________________________________

At the farm, it's a different story. Since we're not there full-time, I don't want to leave anything out that the deer will eat or the weather ruin.

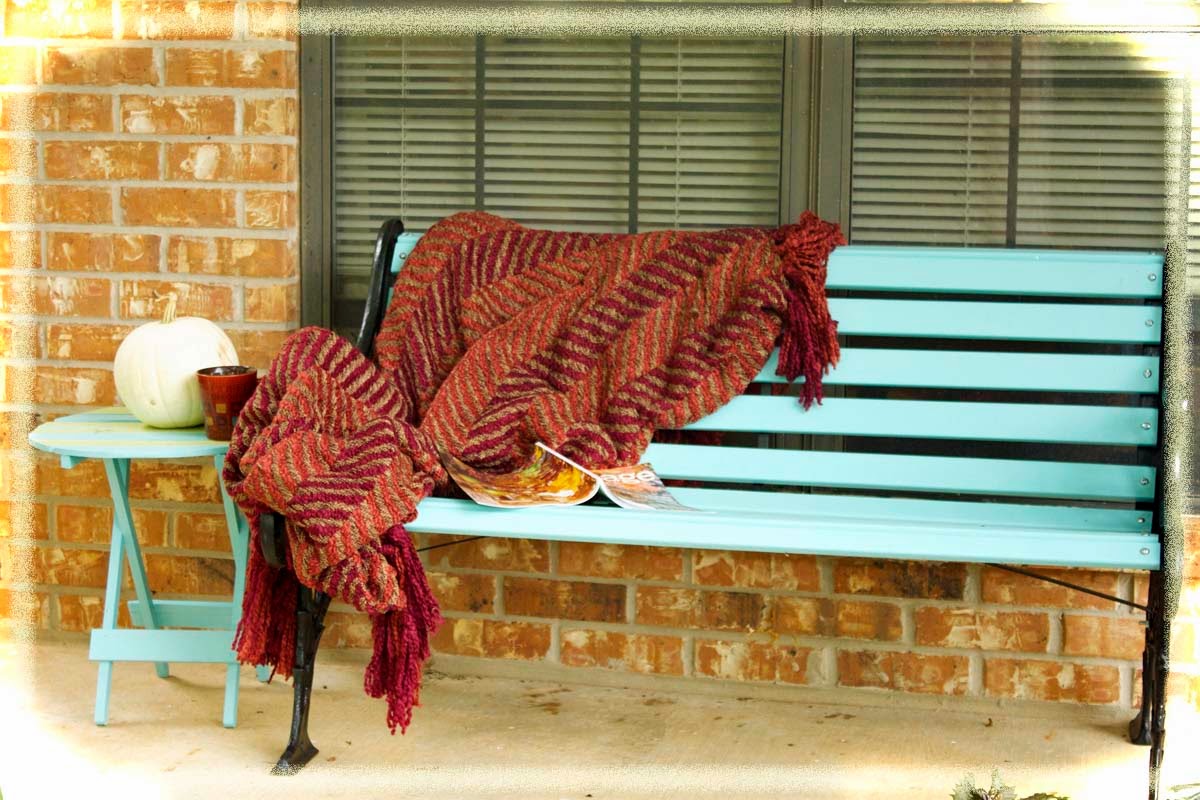
I started with a real white pumpkin on the table next to the bench then I cozied it up with a autumn throw. Throw in a cup of hot tea and a magazine and I'm set for some quiet time:


Of course, it was only cool enough for the throw in the morning but it was soft to lean against. :o) It's all easy to move back inside when not in use.

The reversible Fall/Halloween sign got hung on the door and says it all:


I may or may not have fake pumpkins in urns on either side of the front door. Ok, I do, but they looked so fake I didn't take a picture of them. I need to faux paint them before I show them. :o)

And that, my friends, is my front porch decor. Soon I'll be flipping the sign over for Halloween and adding spooky touches here and there.

Is your porch done?

Hugs,

Cecilia


Friday, September 26, 2014

Colorful Pet Portraits

If you are coming over from Suzan's blog, "Simply Vintageous", welcome! I'm so glad to have you. And I wish you the best of luck in the giveaway.  If you haven't don't know about it, click on the above link so you can enter.
Soda

I know you've seen Soda's painting I did but I want to share with you some others I've done or am working on:
Buddy

Herbie

My colorful Pet Portraits started as a result of taking a fun class painting - you guessed it - Colorful Pet Portraits with acrylics. This was a "stepping out of my comfort zone" class - I'll share why in a bit. We had to send a photo of our pet so the canvas would be ready when we arrived. We could only have one pet in the photo, so I sent in Buddy's picture as I had a better photo of him.


I had fun painting him but to be honest, I'd probably do it a little differently if I had to do it over again and had time to really think it out.  Still, not a bad first attempt.

My husband said Herbie felt left out so I took a good photo of him and then did his portrait. He's such a clown and I think I captured that with his red nose and tongue hanging out.


At the same time, I also did Soda's. I had asked Suzan what colors she preferred and then tried to do the background to capture some of Suzan's style.

These were fun and totally in my style since I could really think about them and didn't have the short time limit of a class.

Now to why the class was out of my comfort zone - I generally do realistic art. I am working on a picture of my niece's horse right now in oil. I still have a lot of hours to go on it but she is coming along nicely.
Maple


So you see, the colorful portraits are a definite break from my norm. They stretch me to do something new which is always good as it helps me grow as an artist. And I have a blast painting them.

So if you're interested in a pet portrait, please leave me a comment below or email me. I am very excited to offer my colorful pet portraits. I look forward to hearing from you!

Hugs,
Cecilia

Thursday, September 25, 2014

Fall/Halloween Reversible Sign

Remember the boards that gave me the wood sliver? They've been waiting for me to work on them and I finally got time to do so.

I knew I wanted to do a Fall sign since Fall is my favorite time of year. I laid the boards out, painted the backgrounds, then all the details.


Then I had a thought! Why not paint the backside so it could be a reversible sign? Ok! I think I will do a Halloween sign for the other side.

Found some inspiration on Pinterest:

source

and came up with this:


Yay! I now have two signs in one!

Fall:


Halloween:


Which is your favorite side?

Now all I have to do is wire it together and add the hanger. Then it's going to the farm!

I'm off to decorate the front porch...From everyone else's posts, I'm obviously behind. :o) Here's a sneak peak at my scarecrow:

He's an oldie but goodie.

Have a great weekend! We're off to the farm. I can't wait!
:o)
Cecilia

Please join me at these parties:
Flusters Creative Muster Party
Lavender Garden Cottage- Cottage Style Party
The Dedicated House Make It Pretty Monday

Friday, September 19, 2014

It's Time To Decorate For Fall, Y'all!

I am so excited! It's that time again! To pull out the Fall decorations and make everything look all Autumn-y (is that a word? It should be). (And I'm sorry, all my northern friends, but I am glad it's here!)


 I am a traditional Fall color girl. I love the reds, oranges, and yellows of Fall. They are my favorite colors in the whole world and I love how God paints the landscape with them this time of year!

Last year's leaf color
We still have plenty of warm weather left here in Texas, but we've already had some hints of cooler weather to come and RAIN!! hurray!

Of course, that has put me in the decorating mood. I put out an early Fall/late Summer look at the farm:
 I love this little scarecrow, although I think he needs a different color of coat - like a red plaid. :o)


Of course, the city house also needed its share of Fall splendor. I started with the buffet, adding a Fall pitcher with leaves, a mercury glass owl, some bronzed faux fruit, and put my little squirrel in the birdcage. Don't worry, he's not trapped - I left the door ajar:


Then I decorated the dining room table...did I mention how happy I am to have that space back as a dining room? I love my art/craft studio being in the spare bedroom so we can sit and dine in this room:

Autumn garland down the middle with my small glass pumpkins, red mercury glass candle holders, and large metal pumpkin on my Fall plaid tablecloth.
Leaf plates from Pier One - I love these! Red plates also from Pier One and the leaf charger from Wal-Mart
Glass with metal accent pumpkin


Moving to my entry table, I added more glass pumpkins, garland, pumpkin-shaped plates, and a couple of small scarecrows:
These pumpkins have an opening in the back for a tea light. I'm using battery-operated ones as they get really hot with a real candle inside.

The old antique radio also got some Fall bling:
More owls (I love owls...I started collecting them long before they became popular...now they are easier to find. LOL), more Fall foliage, and a wood pumpkin I made by layering pieces of fence pickets. Ah, Fall! How I love thee!

With cooler weather headed our way, I'm looking forward to getting some painting projects done...

The dining room table finish is shot (thank goodness for tablecloths!) so it is high on the list, as well as breakfast room paint touch-ups, and various wood signs.

So what's on your list of Fall projects? And do you like the traditional Fall colors or more muted ones? (I have loved seeing all of those in blogy-land! Maybe someday I will try it.)

Have a wonderful weekend and a very Happy Fall, Y'all!

Hugs and blessings,
Cecilia

Monday, September 8, 2014

Fairy Garden Chair or An Inferiority Complex


 This is a story of an Inferiority Complex and how silly I feel for having one.

I entered a contest called "Take A Seat". It benefits the Round Rock Art Council. Artists take or make chairs and decorate them anyway they want.

 I acquired 5 of these chairs at a thrift shop...well, out of their dumpster. They were throwing them away as they had no seats and were in rough shape. I knew I could use them somehow so they came home with me.


Of course, they were perfect for this endeavor. I had lots of ideas...Peacock chair, waterfall, or how about a fairy garden chair? I had lots of bark from the crepe myrtles that seemed perfect for the back to simulate a tree trunk. Ok! I like that idea. I started by spray painting it brown. Added a seat wrapped in moss, then started gluing the bark onto the back.

I made the mushrooms using wine corks and the caps of burl acorns and the door from an old fence picket cut to take advantage of a small knot. A sliver jewelry thing around it to define the "door knob", moss over the top and voila!


One of the mushrooms I turned into a mailbox with a little flag and a letter waiting to be picked up. I'm sorry it's blurry...I am taking a class to learn how to use my camera better. :o)

 I took an empty snail shell from the garden and then some homemade clay and made a snail body. Glued them together, then stitched a mail pouch with "letters".

Of course, it needed a pebble path:

I added a cute fairy figurine waiting on her mail and a bottle cap and spool became a bird bath and twigs tied with twine made an arch:


I named it "Snail Mail".

I felt so good about how it turned out...so cute. Then I delivered it and saw some of the other entries -painted beautifully or amazingly clever like a tire chair. I started second guessing myself, wishing I'd gone with one of the other themes. I even called my husband and told him mine was.no.good.

I felt awful; second-rate artist and all. sigh. Told myself to get over it.

I was not able to go to the award ceremony the next day as we were moving our son. I forgot about the chair until I got an email informing me to come pick it up. Upon finding my chair, I saw a trophy sitting in front of my chair - "First Place:Best in Show".

Did I win? Was that mine? The volunteers there didn't know. They'd find out. But as I hadn't received a notification I'd won, I assumed it placed there in error. So I took my chair and went home.


I told my family about it. Sighed and said, "Oh well. It was fun to make." Decided I was going to pull it apart and use the pieces in a basket with plants. I wasn't ready to tackle that yet so I stuck the chair in the garage.

Later that day, I'm checking my email. I see one from ArtSpace. Could I please come back and pick up my trophy? Have my picture taken? They apologized for not notifying me of my win...crazy Summer and all. I was stunned. I won?!? Then a big smile broke out over my face and I laughed. Bruce and my daughter said we told you so.

I still can't believe it! But today, I will have the trophy to prove it. I'm thrilled to say the least. Will I ever doubt my creations again? Probably. But I'll try to remember the chair and get a grip on those feelings. And create on.

Have a great week!
Cecilia

I'm sharing at these parties:
Lavender Garden Cottage Cottage Style Party
The Dedicated House Make it Pretty Monday Week 113
You're Gonna Love It Tuesday

Saturday, September 6, 2014

Fall Crafting and a Slight Mishap

Today, I am posting at On The Artist's Doorstep about my ongoing Art Studio redo. Please pop over and check out my stool makeover, my addition to my drafting table, and the studio reveal.

I'm now ready to jump into my Fall crafting. I have a stack of fence pickets waiting to be transformed. Here's just a few:


As a matter of fact, I started working on some of them for signage, and in the process of sanding them, drove a sliver of wood deep into my middle finger. Ouch. I tried to get it out but no luck. I finally caved in the next day and went into the minor emergency to let them dig it out. Mercy! A little overkill on the bandage though- lol


Although it is still sore, it is better and I can feel it healing. Not as bad as the bandage above makes it seem. I am ready to tackle those signs.

Oh! I'll be using the palm sander to sand those pickets from now on.

In other news, I found out I won first place in Best in Show in the "Take A Seat" contest. It is a rather funny story. I will share it next week.

Have a wonderful weekend and don't forget to go over and check out my art studio. http://ontheartistsdoorstep.blogspot.com/2014/09/studio-projects-and-reveal.html

Cecilia

Thursday, September 4, 2014

Guest Room Bedside Table

I've been on the lookout for a taller table to use in the guest room. I had this drop-leaf one but it was too short for the bed and guests had to really reach down:

Nothing I found worked - they were all too short and too expensive - then I came across this one at GW:

It was the perfect height but missing its drawer and was very scratched up. But, it was sturdy and only $7! Of course I snatched it up and brought it home.

I filled in the cracks and holes, primed it inside and out with Zinsser primer, then decided to add a small hole to the back for a charger cord. I knew I wanted the table to go with all my mom's furniture in the room, so I started by painting the inside Palladian Blue (Benjamin Moore):


For the outside, I choose Old Masters Silver paint finishing with clear and dark wax. Oh so pretty!


It is a much better height for the bed:

The old drawer opening works really well for a charging cord:

Much better and I love the silver color!

My twin sister got to try it out when she came up to go to Canton this past weekend. She said it is way better!

Just goes to show if you are patient enough you can find the perfect solution and for a good price!

I am sharing here:
The Dedicated House Before-and-After Wednesday

Springtime Projects 3: Have A Seat!

It might still be Spring, but here in Texas, things are starting to heat up and feel like Summer. I knew I needed to get the last of my Spri...