Tuesday, July 30, 2013

Weekend of Fun Plus Best Pancakes Ever!

I didn't get a whole lot done this weekend. Instead we had friends up for a visit.
We met them in town and checked out the Pop-Up Art Gallery, then we had lunch at a great sandwich shop in downtown Palestine. Later, we headed back to the farm to get ready for an evening of fun:

You see, we are neighbors with a vineyard/bed and breakfast/bistro and they had their very first Grape Stomp!

So of course we went and stomped the grapes ( well, our guys didn't - haha).
Me and Susan stomping the grapes

We also enjoyed good Barbeque and great music in the vineyard. My feet still have purple stains on them but I got a cool t-shirt with my footprints on it. :-)
Grape-stained feet!


We enjoyed the evening - the weather was perfect; not too hot- which is rare for July in Texas!
Scott, Susan, Me, and Bruce
_________________________________________________________________________________

The next morning, I made pancakes from the best recipe ever. My sister shared it with me when she came up to visit. This will now be my go to recipe for breakfast/brunches with family and friends. They are absolutely yummy! You make up the mix and just use what you need.
I love just putting fresh strawberries on top. My homemade blackberry sauce tasted great on them too. Of course, I didn't get a picture...in too big a hurry to eat them. ha!

Here's the recipe:


Oatmeal Pancake Mix

4 cups old-fashioned oats
2 cups all purpose flour
2 cups whole wheat flour
1 cup packed brown sugar
1 cup instant dry milk
3 Tbls baking powder
2 Tbls cinnamon 
2 tsp salt
1/2 tsp cream of tarter

Mix all ingredients together well and store in a gallon zip-lock bag or airtight container.  Makes 10 cups of pancake mix.

To Make Pancakes:

2 eggs
1/3 cup canola oil 
2 cups mix
1 cup water

Beat eggs in a large bowl then beat in oil. Alternately add pancake mix and water to eggs and oil. Blend well. Cook pancakes on a hot griddle. (350 degrees on electric skillet) Makes about 10 pancakes. Good with chopped pecans added in.
________________________________________________________________________________

After our friends left, we did get the laundry ceiling painted and started working on my replacement door. I am trying not to feel like this project needs to get done by a certain time. However, it will be great to have this room bright, fresh, AND organized, so I really want it done! I will definitely paint the walls and hopefully get the accent wall done the next time we go up. I will share some of my projects in the meantime, so stay tuned!

Feeling relaxed and happy,
Cecilia

Saturday, July 20, 2013

Back from Vacation

I feel like I've been MIA...

The truth is I've been on vacation ( we went to Washington state with friends to visit friends who'd moved there ):
Bruce and me with Mt. Rainier in the background
Mt. St. Helen - yikes, it's a long way down!

The group - great friends! And yes, that's snow we're standing in

Pike Place Market, Seattle

Space Needle

Then when we got back, we had to help our daughter move. So I haven't had much time to work on projects at all this month. But I'm back and caught up on things; no more excuses, right?

We did run up to the farm this past weekend. I am attempting to rust some tin using safe ingredients but I may give up soon and let Bruce spray it with muriatic acid. I'm not ready to throw in the towel just yet...I want my method to work!!

I need some time to work on the laundry room (or need to feel motivated, more like ). I have curtains to sew, ceiling and walls to paint, wainscoting to hang, and art projects to create. Some I will work on here at the city house, but whew! I need to get with it!

The hollow core door is going to get replaced with an old door I found at an antique store. It has tons of character and I'm adding a fun element to it. Can't wait to show you that.

I added curtains to the back porch too. The back of the house faces west and it gets hot in the summer evenings. We took galvanized 1/2" pipe, hung it, then clipped two 6x9' drop clothes on (slipped the curtain rings on before hanging the pipe).  Easy, instant curtains. We use rope to tie them back. You can see them in the picture below. I'd like to eventually add grommets to the curtains but the rings work for now.

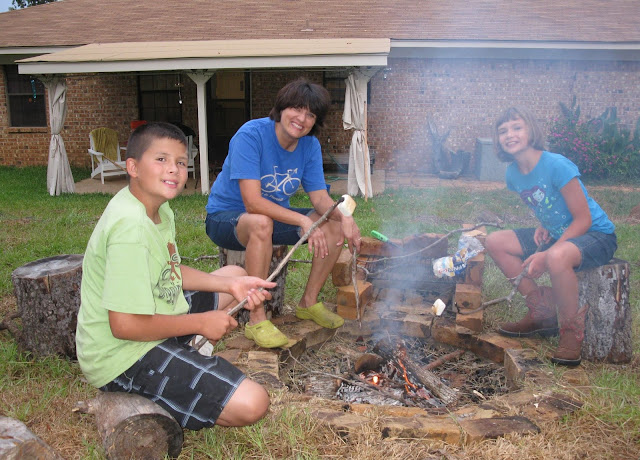
I stayed until Wednesday and my oldest sister came up with two of her grandkids. Because of the rain and an unusual weather pattern, we had unheard of cool temperatures ( high 70's-low 80's not the normal 100s for July!) so we built a campfire one evening and toasted marshmallows. Fun! ( Thanks, Christine, for the picture! )
Me and the kids

We also went up to Tyler to the zoo there. All in all, a fun visit. I enjoyed their visit and the kids had a blast playing with the pups.

I will have to take loads of pictures next time we are at the farm to make up for the lack this time. Hope your summer is going well.


Cecilia

Monday, July 1, 2013

Raggie Star Garland

Happy July 4th week to all from the B Farm! I managed to get quite a bit done from my project list last week. I didn't finish everything but I got the major projects done that needed to be completed by the weekend so I feel good about that. And the mantel is finally decorated for the 4th/Summer. I added a few red flowers to the flower arrangements, the chippy star, a raggie star garland, Uncle Sam made from a piece of fence picket, and the lantern filled with starfish.


 Uncle Sam was made from a piece of fence picket with a strip of wood for hat band glued on then painted. Easy!


One of my projects from last week was making a raggie star garland for the fireplace mantel. I used the technique from raggie quilts - easy to do. I like the way it turned out too.

To begin with, I got 4 different cotton fabrics - 2 reds and 2 blues. I got 1/4 yard of each except for the stripe and I got 1/2 yard of it. You also need some osnaburg fabric - I had some left over from a raggie quilt I'd already made. You can find it with the muslin and other utility fabrics. It frays well.


Next, you cut your star shapes ( I made a template from a piece of cardboard ) - you will need a piece of osnaburg and a front and back of your cotton fabric for each star. I cut out 3 striped stars ( 9 pieces ), 2 dark blue (4 pieces), 2 red floral (4 pieces) , and 2 light blue (4 pieces) and 9 osnaburg stars. Then you layer the stars together - 2 cotton stars, right sides out, with one osnaburg star in the middle. Sew each star with a 1/2" seam allowance. You will then snip each seam allowance 1/4" to 1/2" apart, being careful not to snip the thread. You can see the stitching on the red star below:


Wash the stars then dry them. This causes the edges to fray and rag. Poke a hole in the arms of each star and tie together with twine. Hang and enjoy!


I hope you have a fantastic 4th! I'm off to cooler climates to visit some friends. Looking forward to under 100 degree weather!

:o)
Cecilia

linking up at these parties:
Coastal Charm Nifty-thrifty-tuesday-no170
Life On Lake Shore Drive bouquet-of-talent-linky-party-42
diyshowoff that-diy-party
A Stroll Thru Life 171st-inspire-me-tuesday

Springtime Projects 3: Have A Seat!

It might still be Spring, but here in Texas, things are starting to heat up and feel like Summer. I knew I needed to get the last of my Spri...